General Contractors License Gb98 #416168

Insured And Bonded

Blog

Category: Uncategorized

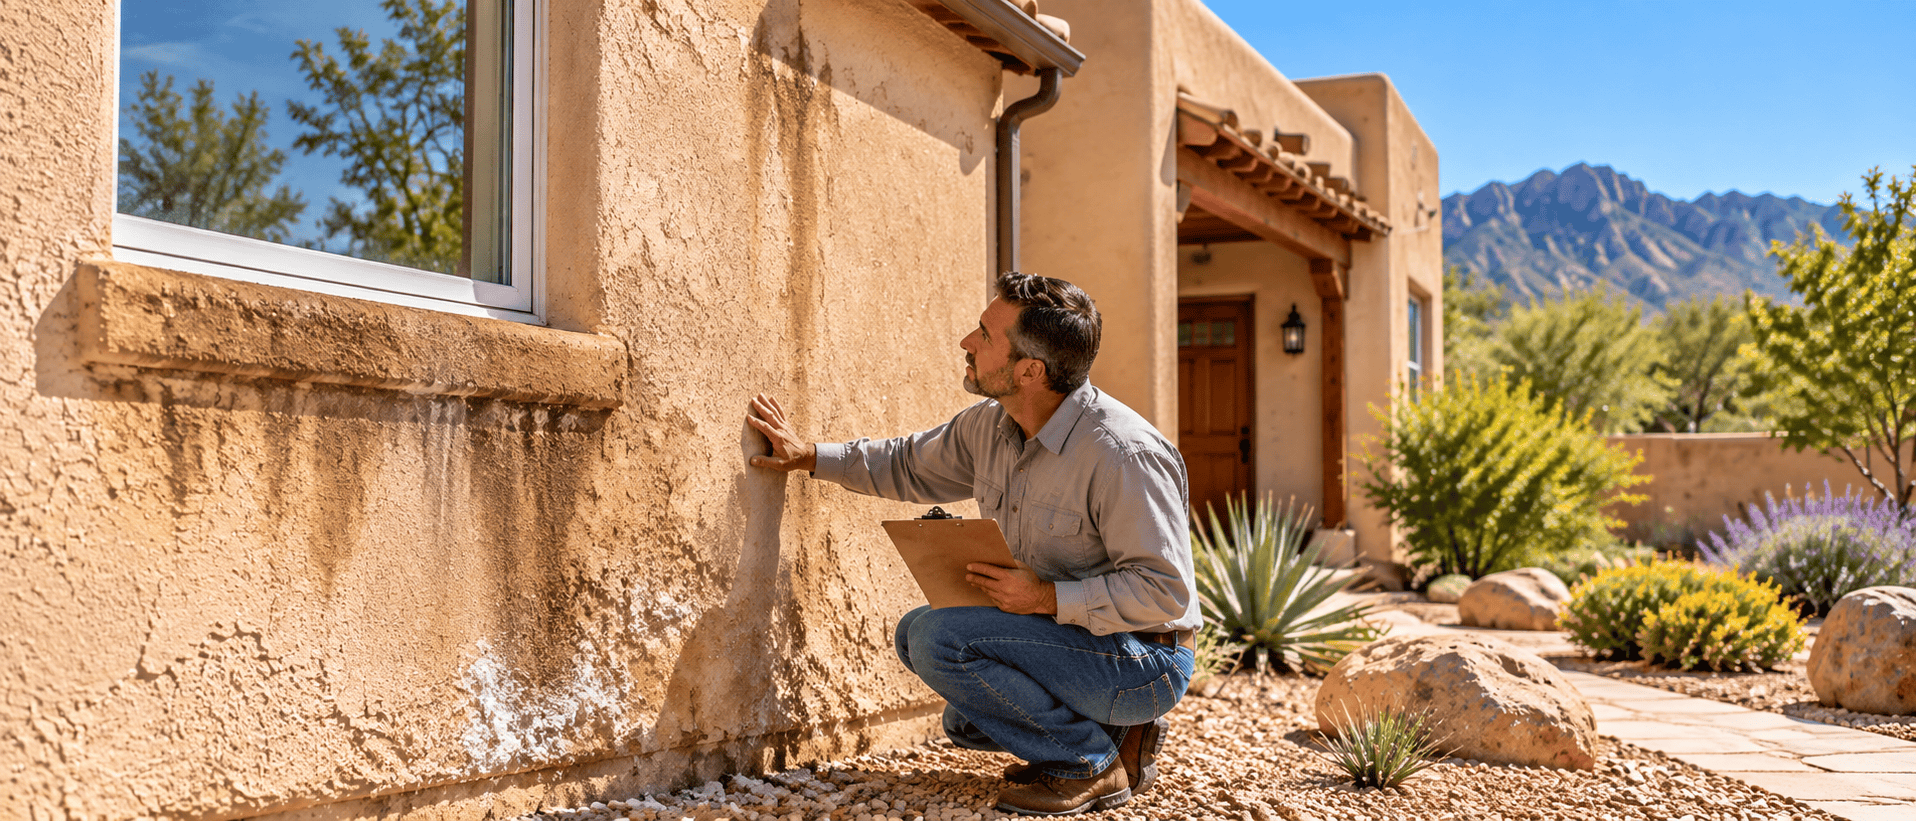
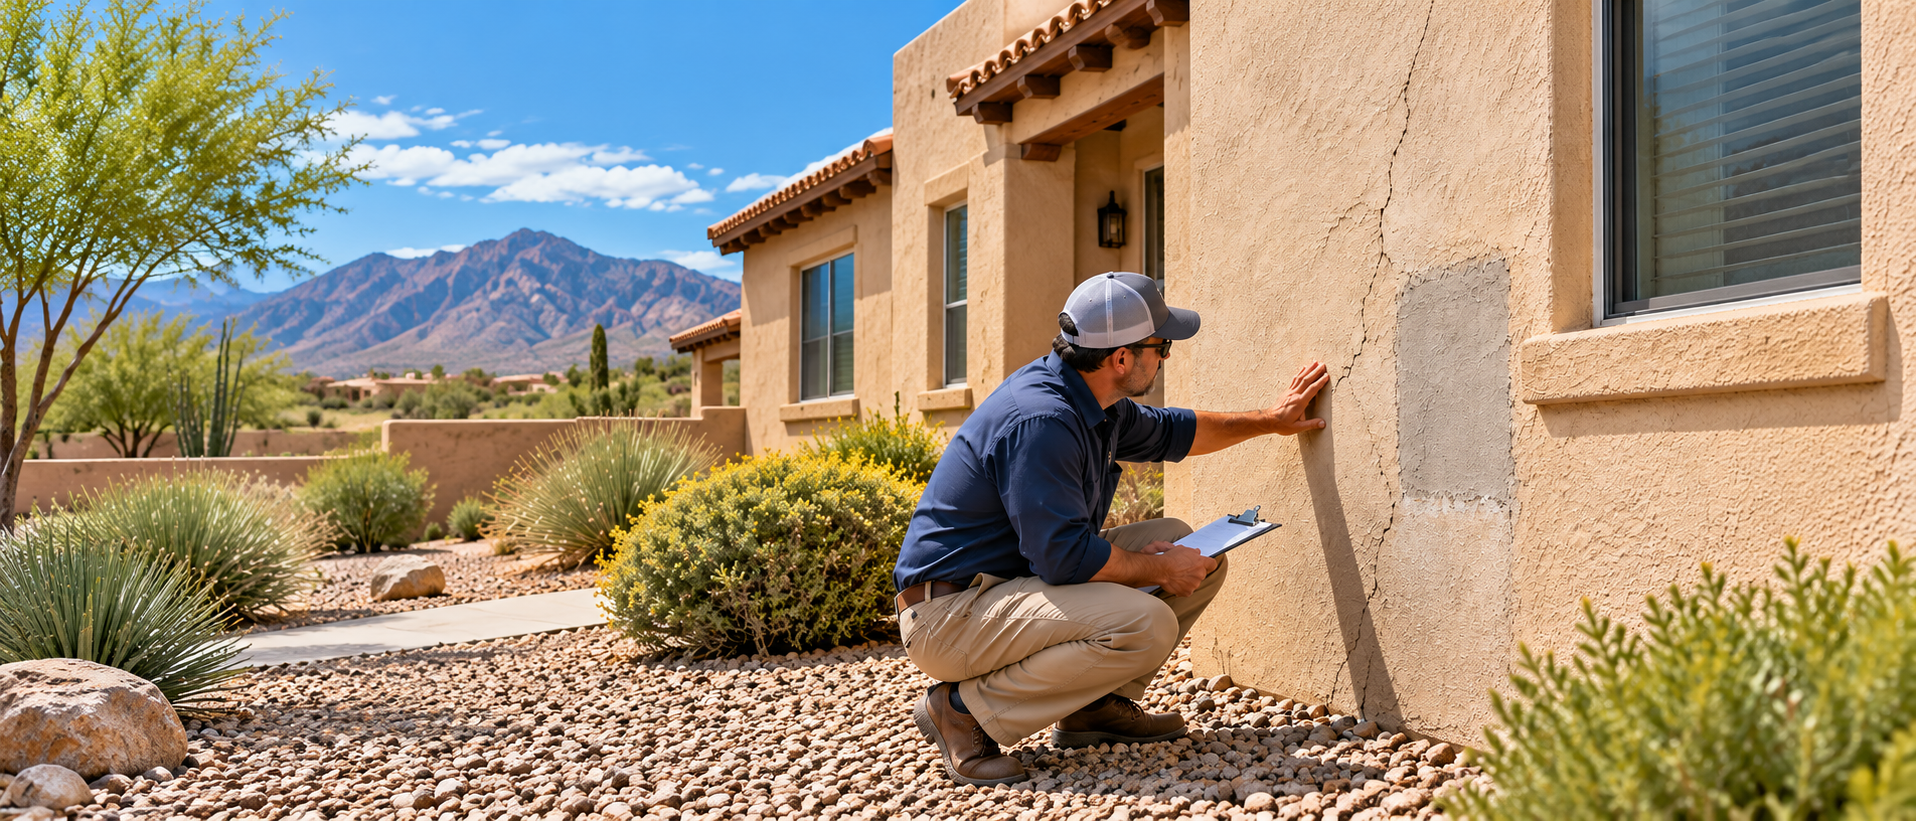
Contractor inspecting cracked stucco and a repair patch on a New Mexico home to assess stucco repair cost in New Mexico.
Uncategorized

Stucco Repair Cost in New Mexico: What Homeowners Actually Pay in 2026

Stucco is the defining exterior finish across New Mexico. It shows up on Pueblo Revival homes in Santa Fe. It covers Territorial-style houses in Albuquerque. It shapes adobe-inspired builds in Taos, and it wraps newer subdivisions in Rio Rancho and Las Cruces. The high desert climate is part of why stucco works so well here. But that same climate is also what wears it down. Intense sun, wide temperature swings, and, depending on where you live, either monsoon downpours or hard winter freezes all take a toll over time. Knowing what stucco repair actually costs in New Mexico helps you budget accurately. It also helps you recognize a fair quote when you see one, and spot an inflated one just as fast. This guide breaks down real 2026 pricing by repair type, by region, and by what pushes the number up or down. For an overview of the work itself, our statewide stucco repair services page covers the systems and methods we use. Pricing on its own only tells part of the story, though. A 1970s adobe-style stucco system in Taos fails differently than a 2005 EIFS system in Rio Rancho. Lath and plaster is the trade stucco actually evolved from, and a contractor who understands it catches those differences early. That saves you from an expensive surprise mid-project. Average Stucco Repair Cost in New Mexico Most stucco repair projects in New Mexico fall between $350 and $6,000. That’s a wide range. A hairline crack on one wall and a wall section with deep water damage are two completely different jobs, and the price reflects that difference. A small patch repair typically runs $350 to $800. A repair involving moisture damage or widespread cracking can climb to $2,000 to $6,000. Full resurfacing of an entire home’s exterior sits in its own category, running $5.00 to $7.50 per square foot, or roughly $7,500 to $18,000 for an average-sized home. A full tear-down to the substrate costs more. See our stucco resurfacing vs. full replacement guide for that breakdown. Repair Type Typical Cost Range Hairline crack repair $150 to $450 Structural crack repair $400 to $1,800 Small patch repair (under 10 sq ft) $350 to $800 Medium patch repair (10 to 50 sq ft) $800 to $2,800 Water damage repair $1,000 to $6,000+ Full resurfacing (per home) $7,500 to $18,000 These figures line up with current national data. Angi, Thumbtack, and HomeGuide all put stucco repair nationally between $8 and $50 per square foot, with typical projects landing between roughly $600 and $4,900. New Mexico’s numbers sit toward the lower-to-middle end of that national band for straightforward repairs. Labor rates here run below coastal and high-cost metro markets, which helps keep routine work affordable. Once water damage or substrate replacement enters the picture, though, New Mexico pricing climbs toward the upper end of the national range just like anywhere else. Stucco Repair Cost Per Square Foot Across New Mexico Per-square-foot pricing is the easiest way to compare quotes from different contractors. It strips project size out of the equation and gives you a clean number to compare. Across New Mexico, stucco repair generally costs $8 to $25 per square foot. Surface-level work sits at the low end of that range. Think hairline cracks or small chips that only need patching. Repairs that require cutting out damaged substrate, replacing wire lath, and matching a custom texture land toward the high end instead. Full resurfacing runs $5.00 to $7.50 per square foot in most of the state. Homes with severe substrate damage, or ones that need a full tear-down, move into replacement pricing, which costs considerably more. Labor typically accounts for at least half the total cost. Licensed stucco contractors in New Mexico currently charge $45 to $75 per hour, and that rate is one of the biggest swing factors in any final quote. How Stucco Repair Cost Varies by Region and Climate New Mexico’s climate isn’t uniform, and neither is the damage stucco takes on across the state. A contractor who only works in one region can easily misread what’s actually failing when they see it somewhere else. Albuquerque. The dominant issue here is thermal cracking. Daytime heat expands the stucco surface, and overnight cooling contracts it right back down. Years of that cycle create hairline and structural cracks over time. The monsoon season, which runs roughly July through September, turns any open crack into a fast-moving moisture problem. Albuquerque also sits at around 5,300 feet, so UV exposure is stronger than at lower elevations. That degrades finish coats faster than in milder climates. See our Albuquerque stucco repair services for city-specific detail. Santa Fe and Taos. At higher elevation, freeze-thaw cycling replaces monsoon damage as the primary driver. Water works its way into a crack, freezes, and expands, forcing the crack wider than it started. This process often reaches the substrate faster than thermal cracking alone would. Repairs in these areas tend to sit toward the upper half of the statewide range, since freeze-thaw damage more often calls for substrate and lath work rather than a simple surface patch. Learn more about stucco repair in Santa Fe and stucco repair in Taos. Las Cruces. Sustained, intense UV exposure in the southern part of the state accelerates delamination. That’s the process where the finish coat starts separating from the base coat underneath. It shows up as chalking, fading, and eventually peeling, rather than cracking outright. Repairs here usually involve more finish-coat work than crack repair, which shifts the cost mix even when the total lands in a similar range to other regions. Details on stucco repair in Las Cruces cover the local delamination pattern in more depth. Rio Rancho. A large share of the housing stock in Rio Rancho was built in the 1990s and 2000s using EIFS synthetic stucco systems. Those systems are now 20 to 30 years old in many neighborhoods, which puts them close to the end of a typical EIFS service life. Homeowners here are more likely to
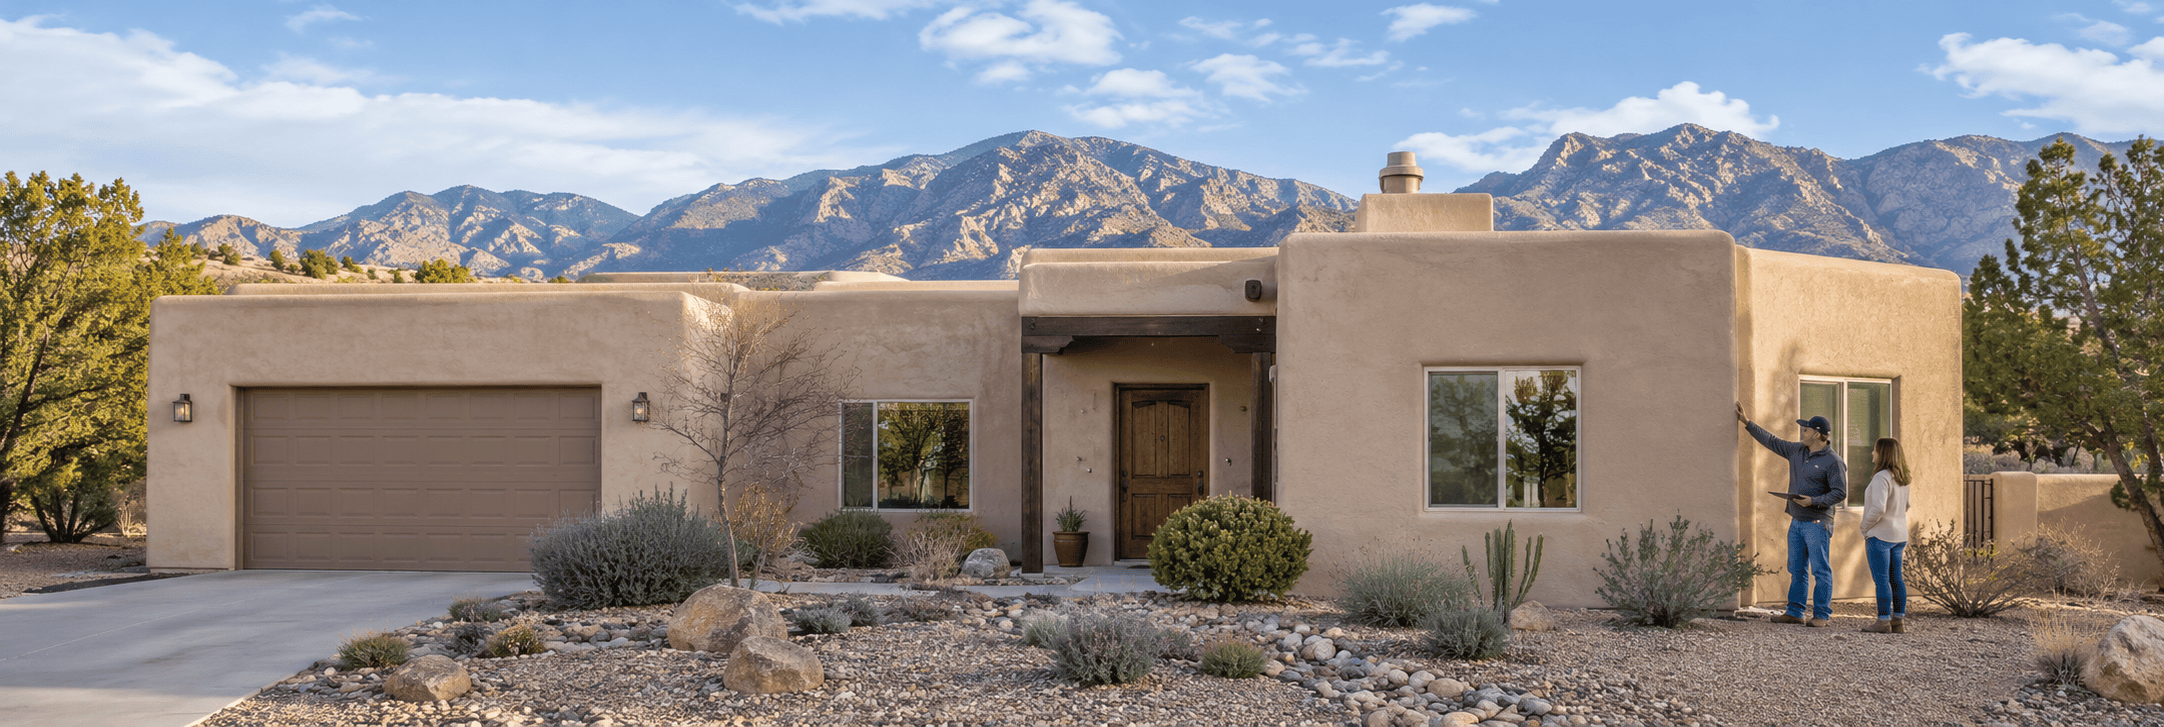
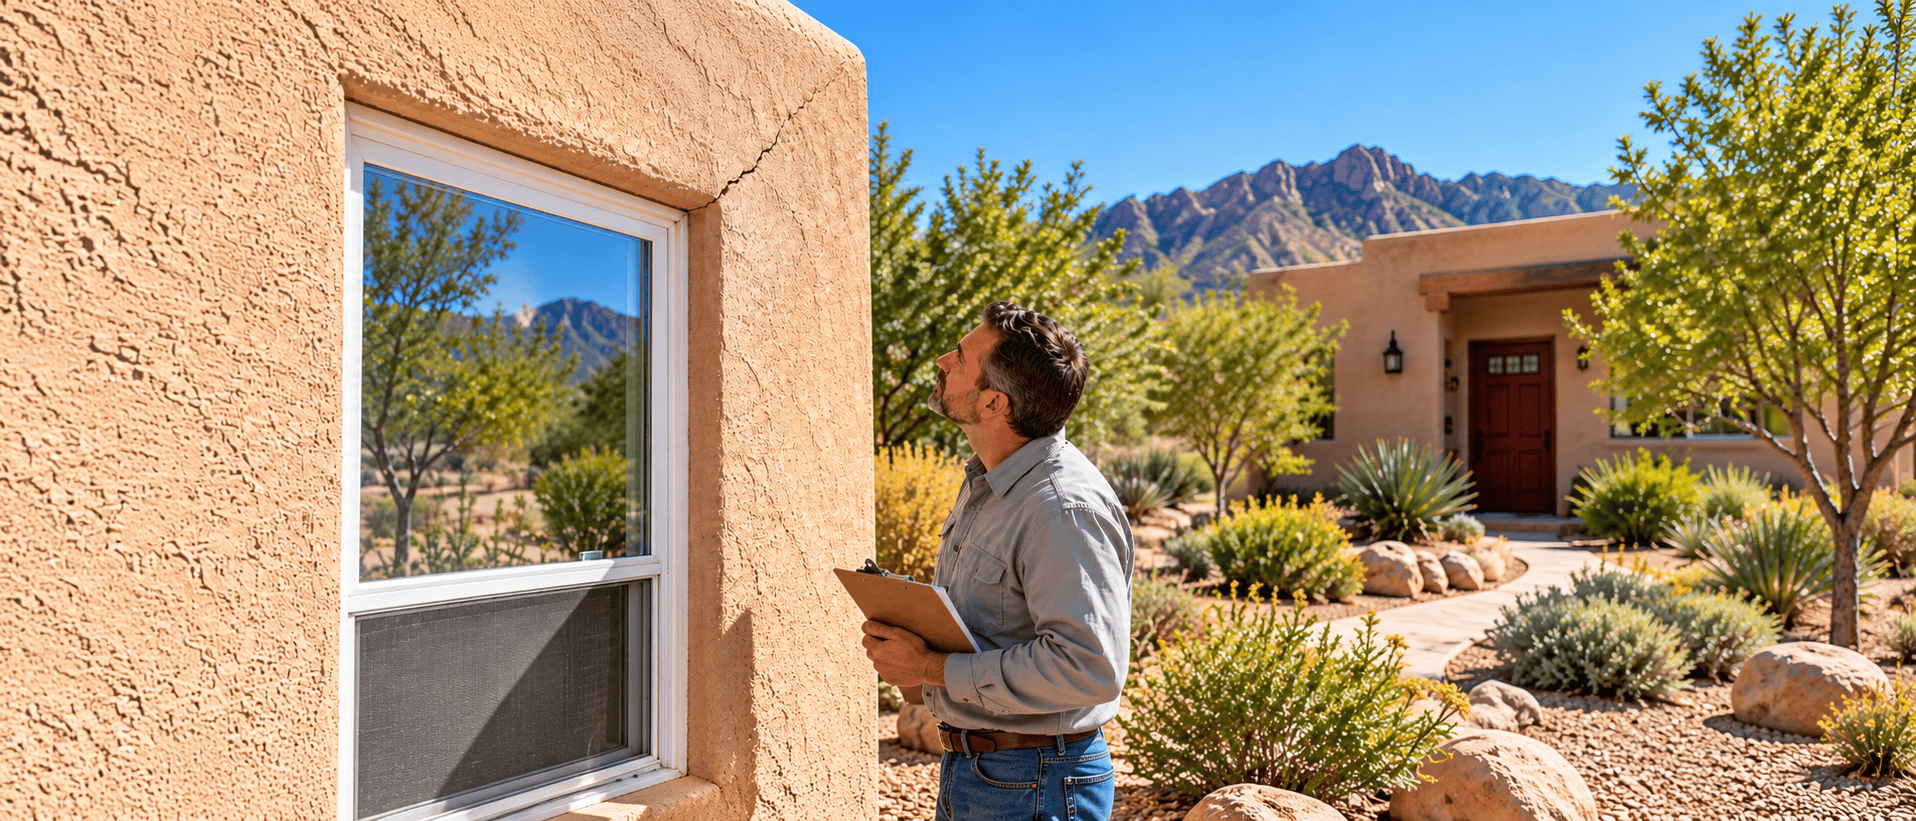
Contractor and homeowner examine a beige home exterior before stucco resurfacing in New Mexico.
Uncategorized

Stucco Resurfacing vs. Full Replacement: Which Does Your New Mexico Home Need?

Stucco begins to show its age in ways that look worse than they are. Faded color, a network of hairline cracks, a patchy section near a roofline: property owners who contact a stucco contractor often believe they are facing a full replacement. More often than not, they are not. But the opposite mistake happens too. A contractor who slaps an elastomeric coat over a moisture-compromised wall has created a moisture trap, not a repair. That is the scenario that turns a $4,000 resurfacing job into a $22,000 substrate rebuild two years later. The right call depends on what is happening beneath the finish coat. Understanding the difference between stucco resurfacing and full stucco replacement. How New Mexico’s climate accelerates certain types of failure is the framework every homeowner needs before spending a dollar. Quick answer: If your stucco substrate is structurally sound and dry, resurfacing is likely the correct scope. If there is moisture infiltration, delaminated base coats, or failed lath, full replacement is the appropriate path. Key Takeaways What Stucco Resurfacing Actually Is Stucco resurfacing means applying a new finish coat (and in some cases a thin color coat or textured acrylic layer) over an existing stucco system that is still performing structurally. The base coat (scratch coat and brown coat in a traditional three-coat system) remains in place. Only the outer layer is refreshed. Resurfacing can accomplish several things at once: It is not a repair for structural problems. Resurfacing works on walls that have reached end-of-finish-coat life but still have a sound, dry base underneath. For homeowners across New Mexico, a quality resurfacing job can extend exterior stucco service life by 10 to 20 years when properly applied over a sound substrate. See our stucco services page for a closer look at the system types we work with across the state. What Full Stucco Replacement Involves Full replacement means removing the existing stucco system entirely, back to the lath, wire mesh, or sheathing, and rebuilding the wall system from the substrate out. In a traditional three-coat cement stucco application, this means a new scratch coat, brown coat, and finish coat. In an EIFS (synthetic foam-core) system, it means removing the foam board, resetting trim, and reinstalling the full system. Full replacement is warranted when: This is a significantly more disruptive and expensive scope of work. It also uncovers any underlying issues with flashing, waterproofing membranes, and window integration that a resurfacing job would simply cover up. That trade-off is simultaneously its greater cost and its greater long-term value. Stucco Resurfacing Cost vs. Replacement Cost in New Mexico Pricing in New Mexico varies by region, system type, substrate condition, and the specific scope of prep work required. These ranges reflect real project conditions across the state in 2026: Scope Description Cost per Sq Ft (NM) Typical Total Range Color Coat Only Elastomeric or acrylic finish coat over sound existing stucco $3.00 – $5.00 $4,500 – $10,000 Full Resurfacing Surface prep, crack repair, full finish coat reapplication $5.00 – $7.50 $7,500 – $18,000 Partial Replacement Remove and replace damaged sections, blend into existing $8.00 – $13.00 $5,000 – $20,000+ Full 3-Coat Replacement Complete removal down to lath, full rebuild $10.00 – $18.00 $18,000 – $45,000+ EIFS Full Replacement Foam board, base coat, mesh, finish: full reinstallation $12.00 – $22.00 $22,000 – $55,000+ Price drivers in New Mexico include access difficulty (single-story vs. multi-level), the age and type of the existing system, whether window and door flashing needs to be reset during the work, and, critically, moisture conditions in the wall. A home in Las Cruces with UV-driven surface delamination on sound dry walls prices very differently than a Santa Fe property where freeze-thaw has damaged the brown coat layer. For an accurate number on your specific property, our team provides free on-site estimates. Contact us through our roofing and exterior services page or the stucco services contact form. How New Mexico’s Climate Shapes the Decision No other factor influences a stucco damage assessment more than where in New Mexico a home is located. The state’s climate variation between its lowest and highest elevations (from Las Cruces in the Chihuahuan Desert to Taos at over 6,900 feet) creates fundamentally different stucco failure patterns. Albuquerque: Thermal Cycling and Monsoon Infiltration Albuquerque’s stucco problem is a two-part cycle. Intense daytime heat expands the wall system; cool overnight temperatures contract it. This thermal cycling opens hairline cracks throughout the dry season. When monsoon arrives in July and August, those cracks act as channels, pushing moisture into the base coat layer before the visible exterior damage signals anything serious. By the time a homeowner notices staining or efflorescence, the moisture has often been in the wall through at least one full cycle. Resurfacing is appropriate for Albuquerque homes with surface cracks that have not yet allowed moisture infiltration. Typically, cracks narrower than 1/16 inch that can be tapped and sound solid. Anything that resonates hollow warrants deeper investigation before resurfacing is considered. Santa Fe and Taos: Freeze-Thaw Damage At higher elevations, stucco failure is more often a freeze-thaw problem than a UV or thermal-cycling issue. Water enters small cracks or permeable areas, freezes, expands, and mechanically fractures the surrounding material. This type of damage progresses faster than UV delamination and tends to affect the base coat more aggressively. Homes in Santa Fe and Taos with flaking stucco, visible vertical fractures along lath seams, or sections that sound hollow are candidates for partial or full replacement more often than ABQ homes with similar surface appearance. Resurfacing over freeze-thaw-damaged base coats delays a larger failure rather than resolving it. Las Cruces and Southern New Mexico: UV Delamination Extreme UV exposure in the southern part of the state causes the finish coat to chalks, loses adhesion, and separates from the base coat rather than cracking. This delamination pattern can look alarming but often indicates a finish layer that has exceeded its service life rather than a compromised substrate. Provided the brown coat beneath is solid (a

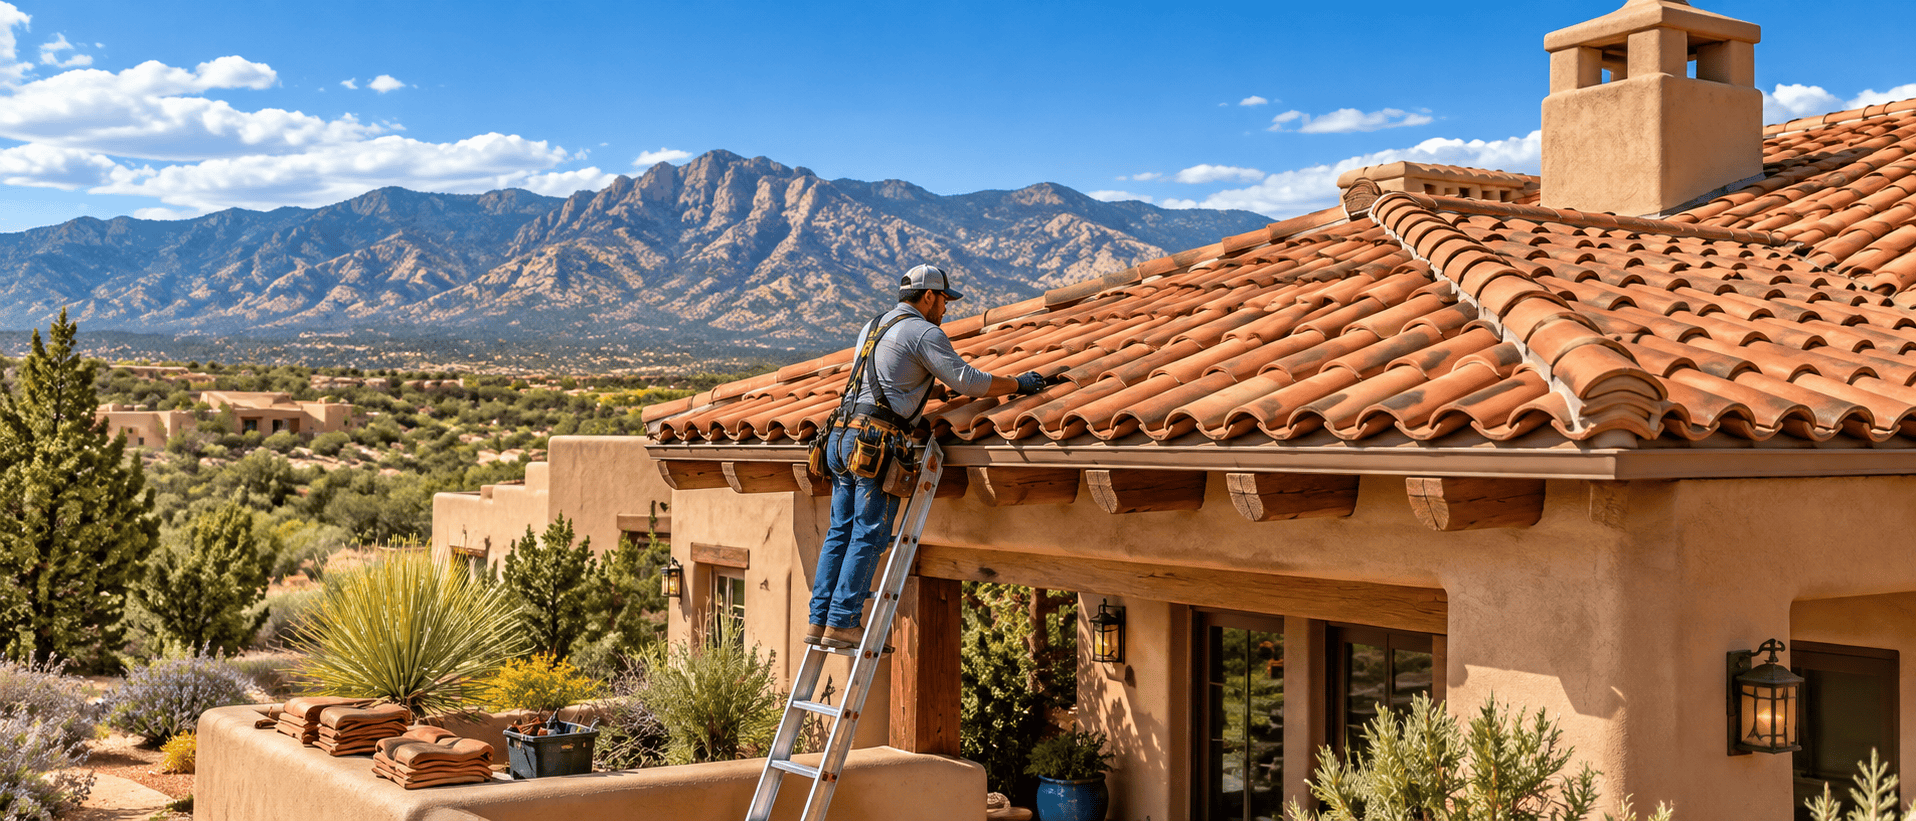
Spanish tile roof repair and replacement in New Mexico, showing a roofing contractor working on terracotta tiles.
Uncategorized

Spanish Tile Roof Repair and Replacement in New Mexico: Costs, Contractors & What to Expect

Clay tile roofs are one of the most recognizable features of New Mexico residential architecture. From Albuquerque’s historic Nob Hill neighborhoods to Santa Fe’s hillside estates, Spanish tile defines the regional look, and for good reason. The material suits the climate, complements the regional style, and outlasts most alternatives by decades when properly maintained. That durability does not make tile roofs maintenance-free. Tiles crack from hail, freeze-thaw cycling, or foot traffic during HVAC service calls. Underlayment deteriorates silently beneath intact-looking tiles over time. Flashing around chimneys and penetrations works loose. When any of these problems appear, New Mexico homeowners need accurate numbers before they pick up the phone. This guide covers real Spanish tile roof repair cost in New Mexico for 2026, helps you decide when repair makes sense versus full replacement, and explains what the project process looks like from first call through final inspection. Why Spanish Tile Roofs Are Common in New Mexico Clay tile fits New Mexico homes on every level, architectural, climatic, and practical. The barrel and S-curve profiles associated with Spanish Colonial and Pueblo Revival construction have defined regional building for more than a century, and that tradition continues in new builds throughout the Albuquerque metro, Rio Rancho, and the East Mountains. Beyond aesthetics, clay performs exceptionally well in the high-desert environment. New Mexico’s intense solar radiation, low ambient humidity, and dramatic day-to-night temperature swings can degrade lesser materials faster than their rated lifespans. Clay tile handles UV exposure without breaking down chemically. It does not warp, rot, absorb moisture, or corrode. In a climate where asphalt shingles often reach the lower end of their expected service life due to UV intensity, tile offers a meaningful longevity advantage. Clay also provides natural thermal mass. The tile absorbs heat during the day and releases it slowly at night, which moderates attic temperatures during New Mexico summers. The airspace beneath a properly installed barrel tile system enhances that benefit further. Typical clay tile lifespans in New Mexico range from 40 to 60 years with routine maintenance. Some well-maintained installations exceed that range significantly. The limiting factor is almost never the tile itself. The underlayment beneath and the metal flashing at penetration points tend to fail first, usually after 20 to 30 years, often while the tile above looks perfectly fine from the street. Spanish Tile Roof Repair Costs in New Mexico Repair costs depend heavily on what has failed and how much of the roof is affected. These ranges reflect realistic 2026 pricing across the New Mexico market. Broken Tile Replacement: $200 to $900 Replacing individual cracked or broken tiles is the most straightforward repair. Labor to remove the damaged piece, source a matching replacement, and set it correctly typically runs $200 to $450 for a single tile. Replacing three to six tiles in one zone is more efficient and often totals $400 to $900. The practical challenge is matching aged tile. Discontinued profiles or color shifts over decades can make finding an exact match difficult and occasionally require sourcing alternatives that blend well rather than match perfectly. Underlayment Repair: $600 to $1,800 When the felt or synthetic underlayment beneath the tiles has failed in a localized section, targeted repair is possible without a full replacement. The process involves carefully lifting tiles in the affected zone, replacing the underlying membrane, and reinstalling the tiles. Costs run $600 to $1,800 depending on area size and how many tiles break during careful removal. Underlayment on homes built before the mid-1990s typically used organic felt, which the National Roofing Contractors Association recognizes as having a significantly shorter effective service life than modern synthetic membranes. If your roof is from that era, a section repair may address one zone while broader deterioration exists elsewhere beneath intact-looking tile. Flashing Repair: $350 to $900 Flashing seals the junctions where the roof meets vertical surfaces, including chimneys, skylights, vent stacks, and parapet walls. These junctions are among the most common water entry points on any roof. Reflashing a chimney or vent penetration on a clay tile roof typically costs $350 to $900. Full chimney reflashing on larger or more complex installations can run higher. Contractors must work carefully around adjacent tiles to avoid cracking them during the replacement process. Leak Repair: $400 to $1,200 Active leaks on Spanish tile roofs often have multiple potential sources. The tile may be intact while water enters through a failed boot seal, cracked flashing, or deteriorated underlayment at a low point. Leak diagnosis and repair typically costs $400 to $1,200, not including any associated interior remediation. Finding the actual entry point on a tile roof requires specific experience with clay systems. Contractors unfamiliar with tile installations sometimes misidentify the source, which leads to repeat callbacks and additional expense. Valley and Storm Damage Repairs: $500 to $4,500 Roof valleys channel significant water volume during New Mexico’s monsoon season, which runs July through September. Failed valley metal allows water to work beneath adjacent tiles. Valley repair or replacement typically costs $500 to $1,500 depending on valley length and configuration. After hail events, multiple tiles may crack across large sections of a roof. Storm damage repairs covering a significant surface area can run $1,500 to $4,500 or more, which shifts the repair-versus-replace calculation considerably. When Repair Makes Sense vs. Full Replacement This decision is one of the most consequential a New Mexico homeowner faces with a tile roof. Several factors shift the calculation clearly in one direction. Roof Age: Tile roofs under 25 years old with localized damage are almost always better candidates for targeted repair. Beyond 30 years, the underlying components, especially the underlayment and original metal flashing, warrant a broader evaluation before committing to repair costs. Extent of Tile Damage: When fewer than 15 to 20 percent of tiles are damaged, repair is typically efficient and cost-effective. Damage affecting 30 percent or more of the roof surface shifts the economics toward replacement, particularly when scattered repair labor across the field approaches replacement cost anyway. Underlayment Condition: This is

Stucco moisture damage with water stains, discoloration, and peeling plaster on a New Mexico home being inspected.
Uncategorized

Stucco Moisture Damage: Warning Signs Homeowners Shouldn’t Ignore

The signs of stucco moisture damage can include persistent discoloration, bubbling or peeling finishes, unusual soft areas, and sections pulling away from the wall. These changes deserve attention, especially when they develop after rain or return after a repair. They do not, by themselves, prove that the wall underneath is wet or rotting. For New Mexico homeowners, the useful question is what has changed and why. A stain that keeps returning below a window tells a contractor more than a photograph of an isolated hairline crack. What happens when water gets behind stucco Cement stucco can absorb moisture. On framed walls, the assembly behind it typically includes a water-resistive barrier and flashing that direct water outward. The Building America Solution Center explains how flashing and drainage outlets help manage water that passes the exterior cladding. Trouble develops when moisture reaches vulnerable materials and cannot drain or dry adequately. Flashing defects, failed connections around openings, roof runoff, or repeated irrigation spray can contribute. Persistent wetting can affect wall cavities and lead to substrate deterioration, but the affected materials depend on how the wall was built. Traditional stucco over masonry, stucco over wood framing, and foam-backed EIFS are different assemblies. An inspection should identify yours before recommending repairs. Five signs of stucco moisture damage worth checking 1. Discoloration that persists or returns Look for new dark patches, runoff streaks, or staining below windows, roof edges, and wall penetrations. Stucco discoloration that returns in the same location after wet weather deserves closer attention. Color alone cannot diagnose moisture intrusion. Dirt, uneven weathering, previous patches, and surface growth can also change a wall’s appearance. Photograph the area after rain and again after dry weather, using roughly the same angle. Note whether it grows or stays darker than the surrounding wall. 2. Bubbling or peeling at the surface A bubbling finish or peeling paint means a surface layer has lost adhesion. Moisture may contribute, but unsuitable coatings, poor preparation, and application problems can also be involved. Determine which layer is failing before choosing a repair. Thin paint peeling from firm stucco is different from a section of the stucco itself separating. Sto’s stucco repair guidance treats surface conditions and repair preparation according to the particular defect. Painting over the area without investigating it can leave the cause unresolved. 3. Unusual soft spots or movement Report any area you have noticed yielding, crumbling, or moving unexpectedly. Stucco soft spots need assessment in the context of the wall system; foam-backed EIFS does not feel identical to hard cement plaster over masonry. Do not press harder, puncture the surface, or probe it with a screwdriver to test for water behind stucco. Surface feel does not establish the condition of hidden sheathing. A qualified inspector can determine whether targeted moisture testing or a limited opening is appropriate. 4. Bulging or separation from the wall Stucco delamination means a layer has separated from the material beneath it. Visible bulging, loose edges, or pieces breaking away warrant prompt assessment. Keep people away from areas where material could fall. Moisture is one possible contributor, alongside bonding or installation problems. In its guidance on historic stucco, the National Park Service explains that water can deteriorate wood lath or corrode metal attachments, eventually allowing stucco to pull away. That mechanism does not apply identically to every modern assembly, so the repair must follow the findings. 5. White mineral deposits that keep reappearing White powdery deposits may be efflorescence: salts carried to the surface by moisture and left behind as water evaporates. Omega Products explains that this can occur during curing or later wetting and drying. Efflorescence alone does not prove hidden damage. However, recurring deposits alongside staining, loose finishes, or indoor dampness provide a reason to investigate the moisture source. Avoid choosing a cleaning treatment until the deposit and finish have been identified. When to arrange an inspection Arrange prompt help for loose or bulging material, active water entry indoors, or an area that is deteriorating noticeably. Recurring stains and failed previous repairs also deserve assessment rather than another cosmetic patch. Indoor dampness near the same opening can strengthen the case for investigation, but plumbing leaks and condensation are other possible sources. Equally, a clean-looking exterior cannot rule out concealed moisture. When you notice possible signs of stucco moisture damage, record: Repair the cause before restoring the finish An inspection should explain where moisture may be entering, how the wall manages drainage, and whether underlying materials need further evaluation. Ask what the visible evidence establishes and what remains uncertain. The resulting repair may involve flashing, drainage, damaged substrate, or localized finish work. Recoating alone does not repair deteriorated sheathing or reattach loose stucco. Avoid sealing drainage openings in an attempt to make the wall watertight. Our guide to stucco repair cost in New Mexico explains why repair scope affects the estimate. For an assessment of signs of stucco moisture damage at your home, explore Happy Homes LLP’s stucco services. Share your photographs and repair history so the conversation starts with the actual symptoms. Frequently asked questions Does a stucco crack mean water is behind the wall? No. A crack may provide a route for water, but its presence does not establish concealed wetting. Location, movement, surrounding details, and other symptoms matter. Can white deposits on stucco be harmless? Yes. Efflorescence can occur without damage to the wall assembly. Persistent recurrence or accompanying deterioration makes investigation more useful than repeated cleaning alone. Can I paint over suspected moisture damage? Have the cause assessed first. Any coating work should follow repairs, appropriate drying, and preparation suited to the existing stucco system.

Why Stucco Cracks Around Windows and Doors in New Mexico Feature Image
Uncategorized

Why Stucco Cracks Around Windows and Doors in New Mexico

A thin crack running from a window corner can leave you wondering whether the wall needs a small repair or a closer inspection. Stucco cracks around windows can develop when the finish or the wall behind it moves, when new material shrinks during curing, or when installation details leave an opening vulnerable. Moisture can also contribute to deterioration around the frame. The crack’s appearance offers clues, but it cannot confirm the cause. A fine line that stays unchanged deserves a different assessment from one that keeps widening, returns after repair, or appears alongside dampness indoors. Understanding those differences helps you decide what to check before covering the damage. Why Do Stucco Cracks Around Windows Start at the Corners? Windows and doors interrupt an otherwise continuous wall. Their corners are places where stresses can concentrate as the surrounding materials move. Cement-based stucco is relatively brittle, so it can crack when those stresses exceed what it can accommodate. That helps explain why a line sometimes extends diagonally from the corner of an opening. The Stucco Manufacturers Association notes that some cracking is expected and commonly appears around window and door corners. However, a diagonal crack does not automatically mean the foundation is failing. Movement in framing or sheathing, shrinkage, and details around the opening can also contribute. Its history matters: did it appear after a window replacement, remain unchanged for years, or recently begin growing? Common Stucco Crack Causes Around Openings Similar-looking cracks can develop for different reasons. Before choosing a repair material, it helps to understand what may be stressing the area. Movement in the Stucco, Frame, or Wall Behind It Materials expand and contract with temperature changes. Wood framing and sheathing can also change dimensions as their moisture content changes. These movements can place stress on the stucco around an opening. Industry guidance on stucco cracking identifies framing, sheathing, thermal effects, and soil movement among possible contributors. A surface patch may crack again if the underlying movement continues or the surrounding detail cannot accommodate it. Shrinkage During Installation or Repair Cement-based stucco can develop cracks as it cures. Application conditions and curing practices influence the result, particularly when fresh material dries too quickly. This is worth considering when cracks appear soon after new stucco work or around a recently patched opening. The timing gives the contractor useful information, although it does not establish the cause by itself. Problems With Reinforcement or Joint Details The reinforcement, trim, and joints around an opening help the stucco assembly handle stress. Missing or unsuitable details can leave vulnerable areas. The correct arrangement depends on the wall and stucco system. Control joints can help reduce cracking in cement plaster, but SMA guidance makes clear that they do not guarantee a crack-free surface. Failed Sealant Joints and Window Flashing A gap between the frame and stucco may be a failed sealant joint rather than a crack through the wall finish. That distinction matters because the repair must address the affected detail. Window flashing has a separate role: it directs water outward and works with the wall’s protective layers. Building America guidance on window and door flashing explains this integration. Adding caulk to the visible surface cannot be assumed to fix a concealed flashing problem, especially when staining or interior dampness accompanies the damage. How New Mexico Weather Can Add to the Problem A wall’s exposure affects the stresses it experiences. Sun warms exterior surfaces, while cooling temperatures allow materials to contract. Those changes can contribute to cracking where the wall assembly has limited ability to accommodate movement, including around openings. Dry weather does not eliminate moisture concerns. The National Weather Service describes New Mexico’s monsoon as a seasonal increase in summer precipitation, largely through thunderstorms. Rain can expose weaknesses in window joints, flashing, and other water-management details. Where freezing conditions occur, moisture within susceptible materials can contribute to freeze–thaw deterioration. However, a crack appearing after winter does not prove that freezing caused it. Its location, progression, and surrounding condition still need assessment. Stucco cracks around windows therefore deserve attention beyond their appearance during dry weather. Staining or dampness that develops after rain gives a contractor useful information about a possible water-entry problem. What About Stucco Cracks Around Doors? Door openings can experience similar stresses, with cracks extending from upper corners or separation appearing along frame edges. A repaired section around a replacement door may also crack if movement or installation details remain unresolved. Look at what has changed alongside the exterior wall cracks. Does the door suddenly rub against the frame? Has a previously repaired line reopened? Is there staining near the threshold after rain? These observations do not establish a structural problem. A sticking door can have several causes, including hardware or alignment issues. Nevertheless, a new operating problem appearing alongside growing cracks is worth reporting during an inspection. Which Stucco Cracks Around Windows Need Closer Inspection? Width is one useful observation, but it cannot tell the whole story. A narrow crack accompanied by interior dampness may deserve more immediate attention than a more visible line that has remained unchanged. Use the following signs to decide what information to collect and when to seek advice. What you notice Why it matters Practical next step A fine crack with no observed change or nearby symptoms It may involve surface cracking or minor movement; appearance alone cannot confirm this Photograph it and watch for changes A gap where sealant meets the frame The perimeter joint may need attention Have the joint and surrounding details assessed A crack that widens, extends, or returns after repair The condition causing it may still be present Arrange an inspection before another patch Interior dampness or staining after rain Water may be entering near the opening or travelling from elsewhere Seek prompt assessment and report when it happens Bulging, loose, or crumbling stucco Damage may extend beyond a simple surface line Have the area inspected before cosmetic work An inspection should consider the stucco system as well. Traditional cement stucco and

Electrician and homeowner discuss an electrical panel upgrade with the protective panel cover in place.
Uncategorized

Signs Your Home May Need an Electrical Panel Upgrade

A breaker that keeps tripping, lights that dip when the air conditioner starts, or plans for an EV charger can all point to your electrical panel. They don’t all point to the same fix. One home needs a circuit repaired, another needs more breaker space, and a third needs a larger electrical service from the utility. This guide covers the most common signs you need an electrical panel upgrade, what each one usually means, and what to ask a licensed electrician before you approve the work. If you are already budgeting, our guide to electrical panel upgrade cost in New Mexico covers pricing, permits, and PNM coordination. If you see smoke, sparks, or flames, get out first. Call 911 from outside, and don’t open the panel or try to shut it off during an active hazard. The U.S. Fire Administration notes that residents may have less than two minutes to escape once a smoke alarm sounds. Panel, Breaker, or Service: Know What Needs Fixing Three parts of the system often get lumped together. The panel distributes power to your circuits. Each breaker protects one circuit. The service is the supply from the utility, including the meter, the service conductors, and the amperage your home is rated to draw. Replacing the panel box alone does not add amperage. A service upgrade, such as moving from 100 to 200 amps, changes the meter equipment and usually involves the utility. A subpanel adds circuit space but no extra capacity. When you compare estimates, ask which of these the proposal actually fixes. Electrical Panel Warning Signs Worth a Closer Look Electrical faults are a real fire risk. The Electrical Safety Foundation estimates that electrical malfunctions cause about 35,000 home fires each year. The signs below deserve attention even if nothing has gone wrong yet. A Breaker Keeps Tripping A trip means the breaker did its job. When the same breaker keeps tripping, the cause may be circuit overload, a failing appliance, or a wiring fault. GFCI and AFCI breakers also trip on ground faults and arcing, as ESFI’s breaker guide explains. Note what was running and which rooms lost power. A space heater and a microwave sharing one kitchen circuit tells an electrician something very different from trips in several rooms at once. Don’t keep resetting a breaker that trips again right away. Never swap in a higher-rated breaker to stop the trips, because the breaker has to match the wire it protects. Lights Dim or Flicker When Big Equipment Starts ESFI lists dimming lights when other devices turn on as a sign of an overloaded system. During an Albuquerque summer, watch whether lights dip each time the refrigerated air cycles on, or, in homes on a private well, when the pump starts. The pattern matters. One flickering fixture usually points to the fixture or its connection. Dimming across several rooms points to the circuit, the panel, or the incoming supply. A panel upgrade won’t fix a loose fixture or a utility-side problem, so have the cause found first. Buzzing, Heat, a Burning Smell, or Scorch Marks The CPSC Guide to Home Wiring Hazards flags sizzling or buzzing sounds, parts that are hot to the touch, and the smell of hot insulation. These need prompt attention, not a wait until the next remodel. Don’t remove the panel cover or touch equipment to check its temperature. Stop using the affected equipment and call a licensed electrician. If you suspect a fire, leave and call 911. Water or Corrosion In or Around the Panel Monsoon storms, a roof leak, a leaking water heater, or a cooler line dripping down an exterior wall can all put water near electrical equipment. Don’t open or touch a wet panel, and don’t assume it is safe once the outside dries. NEMA publishes criteria for deciding whether water-damaged equipment can safely return to service. Leave that call to a qualified electrician. Then fix the water source, whether that means roof repair or plumbing work, so new equipment isn’t exposed to the same problem. Old Equipment With No Safe Repair Path Fuse boxes, panels without approved replacement breakers, and past DIY changes such as two wires under one breaker screw all deserve a professional look. Age alone isn’t a replacement deadline. Among the signs you need an electrical panel upgrade, a documented equipment limitation carries far more weight than the panel’s age. Ask the electrician to identify the make, model, and condition, and whether listed replacement parts still exist. A breaker that physically fits is not automatically approved for that panel. More Appliances Can Change the Capacity Question Electrical panel capacity depends on the service rating and the calculated household load, not on how many empty slots you have. New load is one of the easiest signs you need an electrical panel upgrade to miss, because nothing looks wrong. A home with no faults still needs a review before a large new appliance goes in. Common additions in New Mexico homes include: The Department of Energy’s Building America electrical panel calculator shows how appliance wattage and panel amperage interact, based on NEC Article 220.83. It also states plainly that it doesn’t replace an evaluation by a licensed electrician. Don’t add up the breaker numbers and treat the total as your required service size. That isn’t a load calculation. Give the electrician actual model specifications or nameplate ratings instead. Some homes can avoid a service upgrade entirely. Schneider Electric, a panel manufacturer, says smart panel load shifting can help prevent the need for a service-level upgrade in some homes. That option needs professional design, and it can’t make damaged equipment safe. Plan a Panel Upgrade for Home Remodeling Early Bring up electrical needs while the remodeling scope is still on paper, before appliances are bought and drywall goes up. Moving a kitchen, adding a bathroom, converting a garage, or building an addition can change circuit layout even when service capacity is fine. A useful planning list covers: Illustrative example: A Rio Rancho

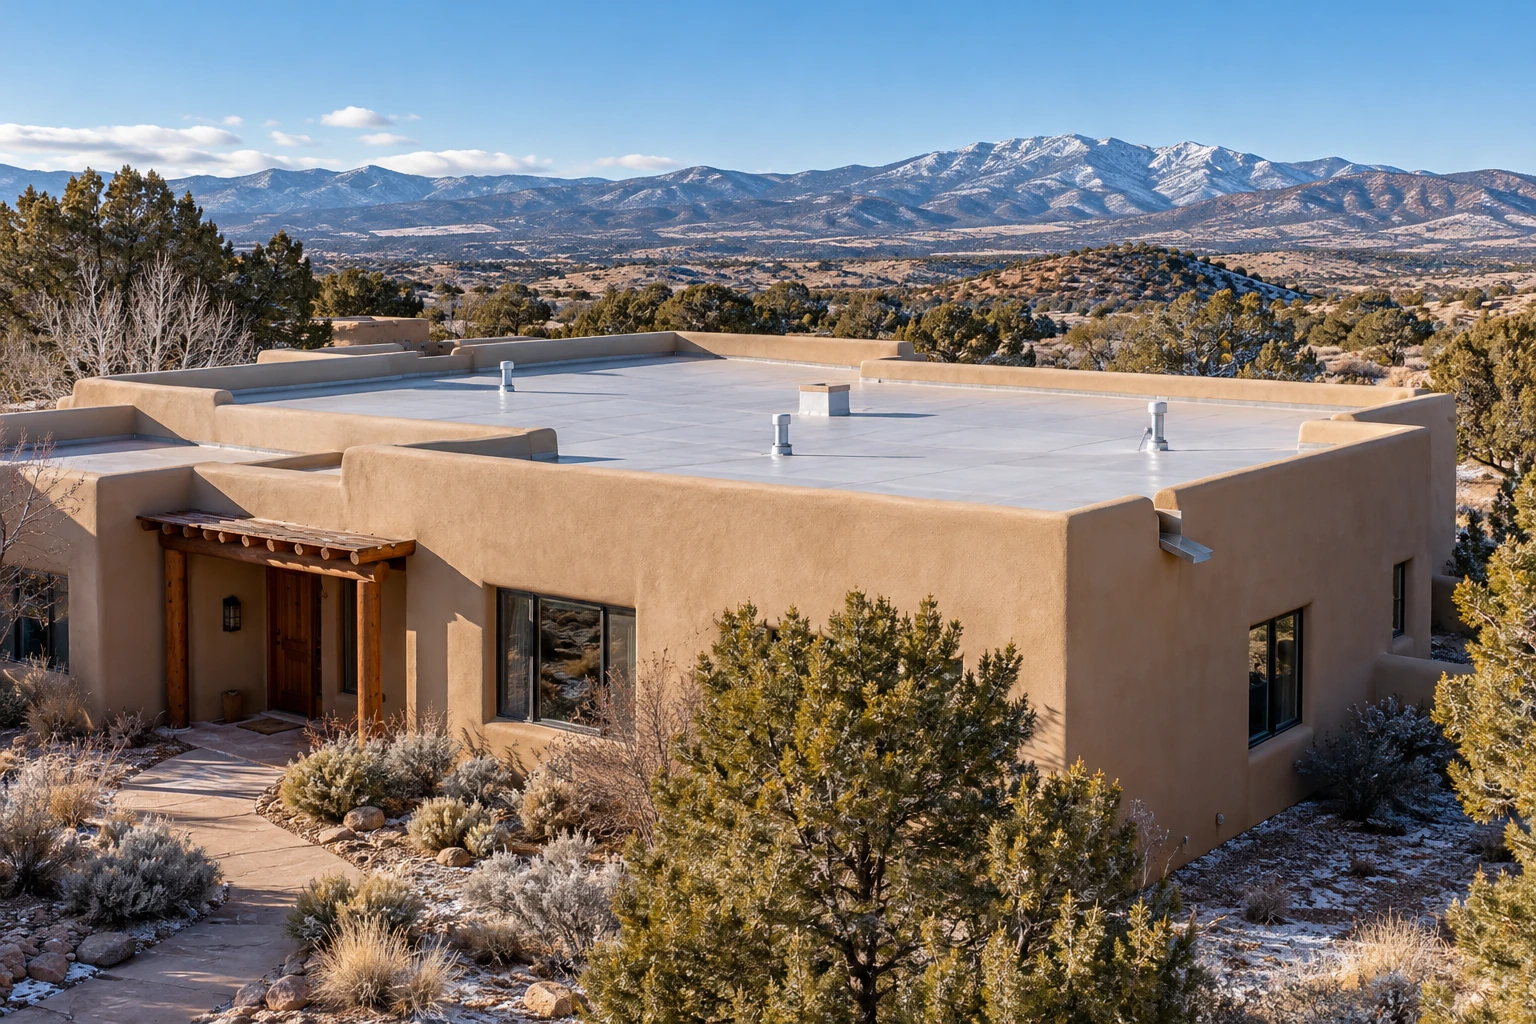
New Mexico stucco home with a low-slope roof and clear parapet drainage outlet before winter weather.
Uncategorized

How to Prepare Your Roof for New Mexico’s Winter Weather

Roof preparation for winter starts with a few practical priorities: identify existing damage, make sure water can drain, and have vulnerable flashing and roof penetrations checked. Finish necessary repairs before freezing weather makes access and scheduling more difficult. A roof does not have to look badly damaged to need attention. A loose shingle, a deteriorated pipe boot, or debris collected at a flat-roof outlet can be easy to overlook during dry weather. Winter rain or melting snow may reveal the problem indoors. This guide explains what you can observe safely, what to ask a roofing contractor to inspect, and which findings deserve prompt attention. Why winter roof preparation matters in New Mexico Winter weather varies considerably across the state. The National Weather Service’s New Mexico winter weather guidance describes how mild conditions in the Rio Grande Valley can coincide with severe winter weather elsewhere. A mountain home and a lower-elevation property need preparation suited to their actual exposure. Where temperatures move above and below freezing, water caught in vulnerable openings can freeze and thaw. Roofing materials also expand and contract as temperatures change, even without freezing water. These are different processes, but both make the condition of seams, connections, and existing repairs worth checking. Plan roof preparation for winter around your location, roof type, and repair history. Start early enough to investigate problems and complete repairs before your area’s first sustained winter weather, rather than waiting for a particular calendar date. Start with a winter roof inspection Begin outside from ground level. Walk around the home and use binoculars or your phone’s zoom to examine visible roof areas. Look for missing or displaced shingles, broken tiles, hanging gutters, and branches resting on the roof. Then check inside. Note any new ceiling stains, peeling paint, or damp areas. If an old stain has changed since the last storm, photograph it and record the date. Tell the contractor about previous leaks and repairs, including problems that seem to have stopped. These observations help guide a winter roof inspection, but they cannot confirm the condition of hidden layers or a roof surface you cannot see. GAF’s homeowner maintenance guidance recommends inspecting shingles from the ground and leaving roof-level flashing inspections to a professional. Ask for photographs and a written explanation of findings. A useful inspection should distinguish an active defect from routine maintenance and explain what needs attention first. Address roof damage before winter arrives Have visible damage assessed while there is time to plan a suitable repair. On shingle roofs, that includes missing, cracked, or displaced shingles. On tile roofs, broken or shifted tiles warrant attention. On membrane roofs, a contractor should check punctures, separating seams, and damaged details. Do not assume that every defect requires replacement. Equally, a roof that has received several patches needs more than another layer of material over the same spot without investigating why it keeps leaking. Ask three questions when discussing roof damage before winter: The answer should determine the work. Avoid choosing a generic sealant or coating simply because its packaging mentions roof leaks. Compatibility, surface condition, and installation requirements matter. Clear gutters and check the full drainage route Water needs a clear route off the roof. On a pitched roof, that may involve valleys, gutters, and downspouts. On a flat or low-slope roof, drainage may depend on roof drains, scuppers, gutters, or a combination of outlets. A scupper is an opening through a parapet wall that allows roof water to discharge. Leaves, twigs, and accumulated debris can obstruct it, even when the rest of the roof looks relatively clean. Have the drainage route checked from the roof surface to the discharge point. An apparently clear gutter does not establish that its downspout is open or that the gutter drains properly. Carlisle’s fall maintenance checklist includes checking drainage performance and evidence of ponding near low points. If water repeatedly remains in the same area, report the pattern. Clearing debris may help, but a persistent drainage problem can require assessment of the slope or outlet arrangement. Arrange professional cleaning where access requires a ladder or roof entry. Never climb onto a wet, snowy, or icy roof to clear an outlet. Have roof flashing and penetrations checked The roof covering is only part of the system. Flashing helps manage water at intersections, edges, and openings. Roof penetrations, such as plumbing vents and skylights, need details suited to the surrounding roof material. Ask the contractor to inspect the relevant areas on your home: The inspection should look for separation, damaged components, loose attachments, and deteriorated seals where sealant forms part of the specified detail. A bead of caulk across a visible gap may leave the underlying problem unresolved. Include these details in roof preparation for winter even if the main roof surface appears sound. Water can enter at an opening without widespread damage to the surrounding roof covering. Give flat and low-slope roofs extra attention A roof described as flat still needs a way to move water toward its outlets. Before winter, ask for drainage, membrane seams, parapet transitions, and penetrations to be reviewed together. Carlisle’s care and maintenance guidance identifies roof edges, penetrations, equipment areas, and the membrane surface as inspection priorities for its systems. Your contractor should follow the instructions for your roof’s actual materials. Mention any recent work on rooftop equipment. Service visits can disturb nearby roofing, and the inspection should include those areas. If recurring leaks raise questions about more extensive work, read our guide to flat roof repair vs. replacement in New Mexico. The seasonal priority is to understand the current defect and agree on a suitable response before the next storm. Check indoors for signs of water intrusion An indoor stain is a reason to investigate, not proof of a roof leak. Plumbing, condensation, and other moisture sources can produce similar symptoms. Record when the problem appears. Does it follow rain, occur during snowmelt, or persist in dry weather? Note whether it is close to a bathroom, a vent, or a

adobe-home-construction-in-new-mexico
Uncategorized

Adobe Construction Cost in New Mexico: What Actually Drives the Price

A contractor quoting $180 a square foot for an adobe home and another quoting $340 for what sounds like the same project can both be pricing it honestly. The gap usually is not padding on one end or a lowball on the other. It comes from real differences in wall thickness, where the brick is sourced, and sometimes from whether the walls are earthen at all, since a good share of what gets sold as “adobe” in New Mexico new construction is stucco over a wood frame, styled to look the part. Our own breakdown of what it costs to build a house in Albuquerque puts finished conventional construction between roughly $175 and $310 per square foot depending on build type and finish level. True adobe, the kind where the block itself carries the structural load rather than framing behind a finish coat, typically runs 15 to 25 percent above that. Applied to the same range, that puts full adobe construction closer to $200 to $390 per square foot for the shell, before land, design fees, engineering, and site work are added in. That range still is not the full picture, because adobe is not one method. It is several, and each prices differently. Traditional Adobe and Modern Adobe Price Differently A lot of what gets marketed as “adobe” in New Mexico new construction is actually stucco applied over wood or steel framing, styled to look like adobe without the earthen wall behind it. That approach costs closer to conventional stucco-clad framing, because structurally it is conventional framing. True adobe construction is a different category. Within it, the block itself varies. Traditional adobe brick is sun-dried earth, sand, and straw with no added stabilizer, typically produced on or near the site. Semi-stabilized brick adds a small amount of asphalt emulsion or cement to improve moisture resistance. Fully stabilized or pressed adobe block uses mechanical compression and a stabilizing agent, which increases strength and lets crews work through more of the year, but it also raises the material cost per unit. Sourcing matters as much as the block type. Bricks made on site from suitable local soil are usually the cheapest option, since you are paying for labor and molds rather than transport. Bricks purchased from a commercial adobe yard cost more per unit but arrive with more consistent dimensions and documented compressive strength, which matters for permitting. Either way, material cost is rarely what drives an adobe budget. Labor is. What Actually Makes New Adobe Construction Expensive The wall is the biggest cost driver, and it drives several other costs with it. Adobe walls are typically 10 to 14 inches thick to meet New Mexico’s structural provisions for unburned clay masonry, compared with roughly 6 inches for a framed wall with siding. That extra mass means a heavier foundation is required to carry the load, more material and labor to raise the wall itself, and a longer timeline since courses need to cure between lifts. Skilled labor is the second constraint, and it is a real one. Framing crews are common across New Mexico. Crews with genuine adobe experience, meaning they understand coursing, bond beams, and how to tie a roof system into an earthen wall correctly, are a much smaller pool, concentrated around Santa Fe, Taos, and parts of the Albuquerque metro. That scarcity shows up directly in labor rates and in how far in advance you need to book a qualified crew. Roofing and drainage detailing add cost that a conventional home does not carry in the same way. Water is adobe’s primary threat, so flat parapet roofs with canales, proper roof drainage away from the wall base, and foundation moisture protection are not optional extras. They are what keeps the wall system performing for decades instead of degrading in a few wet seasons, and skipping or underbuilding them is the single most common way an adobe project gets expensive later instead of now. Engineering and design documentation cost more too. New Mexico’s building code requires construction documents from a registered design professional for most structural work, and adobe carries its own set of structural provisions beyond the standard residential code, which means the architect or engineer on an adobe project needs specific familiarity with earthen construction, not just general residential design experience. Adobe Additions Carry Their Own Cost Logic Adding onto an existing adobe home is not simply new construction at a smaller scale. The new wall has to tie into an existing foundation that was designed decades, sometimes a century, before current code. Matching wall thickness, plaster texture, and finish color against a wall that has weathered for years is a skilled, time-consuming task, and a visible mismatch is often more costly to fix after the fact than to get right the first time. Location within New Mexico affects addition pricing more than it does for a standard framed addition. Santa Fe and Taos tend to sit at the top of the state’s addition cost range, partly because of the same adobe-specific labor scarcity described above, and partly because historic district design review in those markets adds time and documentation that flows directly into project cost. Albuquerque and Las Cruces generally sit in the middle of the range, with more contractor competition and less blanket historic review. Rural areas can price lower, but material and skilled-labor transport can offset some of that savings depending on the site. If your addition also touches an existing room, our home addition team handles the structural tie-in and permitting alongside the adobe-specific work, rather than treating them as two separate contracts. Restoration and Repair Have the Widest Range of Any Adobe Project New construction and additions at least follow a predictable cost logic once you know the scope. Restoration does not, because the starting condition of the wall varies enormously from one property to the next. On the low end, routine adobe maintenance, meaning re-plastering or re-mudding a wall that is otherwise structurally sound, is a relatively contained expense

permit-for-bathroom-remodel-new-mexico
Uncategorized

Do You Need a Permit for a Bathroom Remodel, Room Addition, or Roof in New Mexico?

Key Takeaways A bathroom remodel needs a permit in New Mexico when it touches plumbing, electrical wiring, structural framing, or mechanical systems. Swap a vanity, retile the floor, or repaint, and most jurisdictions will not ask for paperwork. Move a drain line, relocate a wall, or add a new circuit, and you are now in permit territory. The determining factor is what changes inside the walls, not the fact that the room happens to be a bathroom. New Mexico applies one standard across every trade, at least on paper. Under the state’s Construction Industries Licensing Act, building alterations, along with electrical, plumbing, or mechanical work, require a permit before the work starts, unless the project falls under a narrow, clearly defined exemption. That standard comes from the state, but who actually issues the permit and inspects the work depends on where the property sits. Permitting Is Split Between the State and Local Jurisdictions This is the part a lot of general how-to articles skip. New Mexico does not run one single permitting office for the entire state. The Construction Industries Division, part of the Regulation and Licensing Department, issues permits directly in many counties and smaller towns. Albuquerque is different. The city runs its own Building Safety Division inside its Planning Department, issuing building and trade permits and running inspections under its own locally adopted administrative code. Santa Fe, Las Cruces, Rio Rancho, and several counties have their own arrangements too, some administered locally and some routed back to the state. If your project sits inside Albuquerque city limits, you are dealing with the city. Outside it, you are more likely dealing with the state CID office instead. Confirming which office covers your address is the first real step, before you worry about exemptions or paperwork at all. Bathroom Remodels: What Actually Triggers a Permit For a bathroom remodel specifically, the work that reliably requires a permit includes moving a toilet, tub, or shower to a new location, adding or relocating supply and drain lines, running new circuits or adding a dedicated outlet, adding an exhaust fan where none existed, and removing or altering a wall, even a short one. Work that typically stays permit-free includes replacing fixtures in the same spot, new tile or flooring, a new vanity connected to the existing plumbing stub-outs, and cosmetic finishes like paint or a light fixture swap on an existing circuit. The safest approach for a full bathroom remodeling project, especially one that repositions plumbing or adds a new circuit, is to assume a permit applies and confirm the exact scope with the local building office before demolition starts. A five-minute phone call costs far less than tearing out finished tile later because an inspector needs to see the rough plumbing. Work That Usually Does Not Need a Permit Not every project touches the permit system, and jurisdictions generally carve out a category for genuinely minor work. Albuquerque, for example, treats fences and walls under six feet differently from taller ones, and offers a lighter minor alteration and repair permit for small jobs that do not rise to the level of a full building permit. Cosmetic swaps that do not change plumbing, wiring, or structure, new countertops, cabinet fronts, flooring, or paint, generally fall outside permit requirements almost everywhere in the state. The exact line still depends on your local building department, since what counts as minor in one town is not automatically minor somewhere else, but these categories give you a reasonable starting point before you call to confirm. Room Additions: Expect a Full Building Permit A room addition sits on firmer ground than a bathroom refresh: expect a full building permit almost every time. New square footage means new foundation or footing work, framing tied into the existing roof structure, new electrical and plumbing runs, and often a new HVAC branch, all of which fall squarely inside the building code. Depending on the size and structural complexity of the addition, plans may also need to carry the seal of a licensed New Mexico architect or structural engineer before the permit office will review them. That requirement is not universal for every addition, but it comes up often enough on larger or structurally complex projects that anyone planning a home addition should ask about it early, while the design is still on paper rather than already framed. Room additions also overlap with garage conversions and covered patio enclosures, which homeowners sometimes assume are smaller undertakings than a full addition. Albuquerque’s building department treats these the same as new conditioned space, requiring permits, inspections, and often engineered drawings for the roof and wall assemblies involved. Assuming a project is minor because it reuses an existing structure, such as turning a garage into a bedroom, is one of the more common mistakes homeowners make before pulling a permit. Homeowners researching costs for a specific type of addition can also see how these factors play out in practice in this breakdown of what drives the cost of adding a bathroom in New Mexico. Roofing: Usually Permitted, but Confirm the Scope Roofing sits somewhere in between. Multiple New Mexico jurisdictions, including Albuquerque and several counties, specifically call out re-roofing and roof replacement as permit-required work, tied to a required inspection. Some smaller repair jobs, patching a section, replacing a few damaged tiles, resealing flashing, may qualify for a lighter minor alteration and repair permit rather than a full building permit, depending on the jurisdiction. A full roof replacement almost always needs the standard permit and inspection process. Because the line between repair and replacement is drawn differently from one building department to the next, the only reliable move is to ask your specific jurisdiction before work begins, rather than assuming a rule from a neighboring town applies to your address. Who Pulls the Permit: Contractor or Homeowner Either a licensed contractor or the homeowner can typically apply for a residential permit, but the two paths carry different obligations. When a licensed contractor pulls the

how-to-add-a-bedroom-new-mexico
Uncategorized

How to Add a Bedroom to a House in New Mexico: What It Takes, What It Costs

A bedroom addition sounds simple until you get into the details. Adding one to a New Mexico home usually means one of two things, either building new square footage onto the existing structure or converting a space that already exists, like a garage, an enclosed porch, or part of an oversized living area. Each path carries a different structural scope, a different permitting process, and a different timeline. There’s also a detail that catches homeowners off guard. Not every extra room counts as a bedroom on paper. Appraisers, lenders, and MLS listings only recognize a room as a legal bedroom if it meets specific requirements for size, light, heat, and emergency egress. A framed-out room with a closet and a door isn’t automatically a bedroom in the eyes of anyone who matters once you go to sell the house. That distinction shapes almost every decision covered below. What Goes Into Adding a Bedroom Whether you’re building out or converting existing space, a bedroom addition touches most of the trades in home construction at some point. New construction starts with the foundation, matched to whatever the existing home is built on, whether that’s a slab or a stem wall footing. Framing comes next, and the roofline is where a lot of additions succeed or fail visually. Tying a new roof into an existing one at the correct pitch, without an awkward valley or a flat spot that collects water, takes real planning before the first stud goes up. From there, the sequence is familiar: exterior sheathing and weather barrier, windows and doors set in their rough openings, insulation, drywall, and whatever exterior finish matches the rest of the house. In New Mexico that’s usually stucco, and matching an existing stucco texture and color on a new wall section is its own specialized skill, not something every general framing crew handles well. Electrical work extends a circuit or two for outlets, switches, and lighting. Heating and cooling either tie into the existing ductwork, if the system has capacity, or get handled with a ductless mini-split for the new room. A conversion project adds a step most new additions skip: demolition and cleanup of whatever the space was used for before, which is its own line item when a garage or storage room is full of years of accumulated stuff. None of this is exotic work on its own. What makes a bedroom addition more involved than, say, a deck or a patio cover is that every one of these systems has to meet the same code requirements as the rest of an occupied, heated living space, because that’s exactly what a bedroom is. What Makes a Room a Legal Bedroom New Mexico’s statewide construction rules are built on the 2021 International Residential Code, adopted with state amendments through the Construction Industries Division. Home-rule cities including Albuquerque and Santa Fe can add stricter requirements on top of that baseline, so the exact numbers below can shift slightly depending on where the house sits. Always confirm current requirements with the local building department before finalizing a design. With that caveat, a handful of requirements consistently define whether a room legally functions as a bedroom. Floor area and ceiling height. Sleeping rooms need a minimum floor area, and most of that room needs a ceiling height of at least seven feet. Sloped ceilings, common in additions that tie into an existing roofline, only count toward that minimum where the ceiling actually clears the required height. Natural light and ventilation. Bedrooms need window area sized as a percentage of the room’s floor area, split between light and openable ventilation. Emergency escape and rescue openings. This is the requirement homeowners are least likely to know about going in. Every sleeping room needs an egress window or door, sized with a minimum net clear opening, a maximum sill height above the finished floor, and minimum width and height dimensions. A window that looks plenty big from across the room can still fail egress sizing once someone measures the actual clear opening. Heat and safety systems. A bedroom needs its own heat source capable of maintaining a minimum indoor temperature, along with a smoke alarm inside the room and CO alarms nearby if the home has fuel-burning appliances or an attached garage. Closets. Building code generally doesn’t require a closet for a room to count as a bedroom, but appraisers and real estate listings often expect one anyway. Skipping a closet to save a few square feet can technically pass inspection and still cost you at resale. New Addition or Converting Existing Space Not every extra bedroom needs new square footage. Garages, enclosed porches, bonus rooms over a garage, and oversized living rooms all get converted into bedrooms regularly across New Mexico, and the decision between building new and converting existing space usually comes down to what the existing space is missing. A garage conversion sounds like the cheaper option because the foundation, walls, and roof already exist. That’s often true, but only after the space clears the same bedroom requirements as new construction. Garages rarely have egress windows sized for a bedroom, insulation built for living space rather than vehicle storage, or ductwork extended that far. Bringing a garage up to code can mean cutting in a new window opening, adding wall and ceiling insulation, extending HVAC, and sometimes raising the floor slab to match the rest of the house. None of that is impossible, but it adds up, and a homeowner who assumes a garage conversion is automatically the budget option is sometimes surprised by the final number. Converting part of an oversized living room, or finishing an attic or basement space, runs into the same pattern. The framing might already exist, but the egress, insulation, and mechanical requirements don’t disappear just because walls are already standing. Building new square footage skips those retrofit problems but starts from bare dirt, with a full foundation, framing, and roof tie-in ahead of it. There’s no universal answer for