Lifespan, Warning Signs & Replacement Timeline
| Quick answer: A properly installed traditional three-coat stucco system in New Mexico typically lasts 50 to 80 years structurally, though the visible finish coat needs attention every 15 to 25 years. EIFS (synthetic stucco) systems have a shorter practical lifespan, often 20 to 30 years, because moisture problems tend to surface earlier. The number that matters most for your specific wall isn’t the material’s theoretical maximum. It’s how the original installation handled moisture, and how the last owner maintained it. |
Most articles answer this question with a single number, as if every stucco wall in Albuquerque, Santa Fe, and Las Cruces ages on the same clock. It doesn’t. A wall installed correctly over a proper weather-resistive barrier, with a weep screed sitting where code requires it, behaves nothing like a wall where a previous contractor skipped the control joints to save a day of labor.
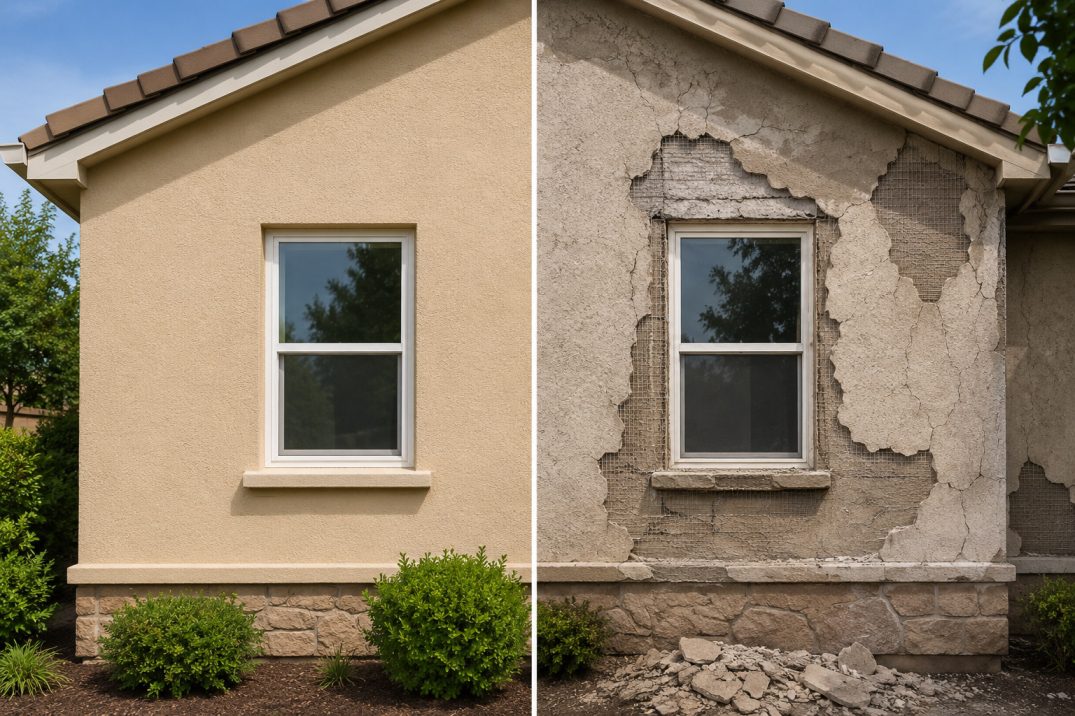
This guide breaks lifespan down by system type, walks through what actually determines whether your stucco hits year 20 or year 60, and gives you a decade-by-decade picture of what aging stucco looks like in New Mexico so you can tell the difference between a cosmetic issue and a wall that’s telling you something serious.
Lifespan by Stucco System Type
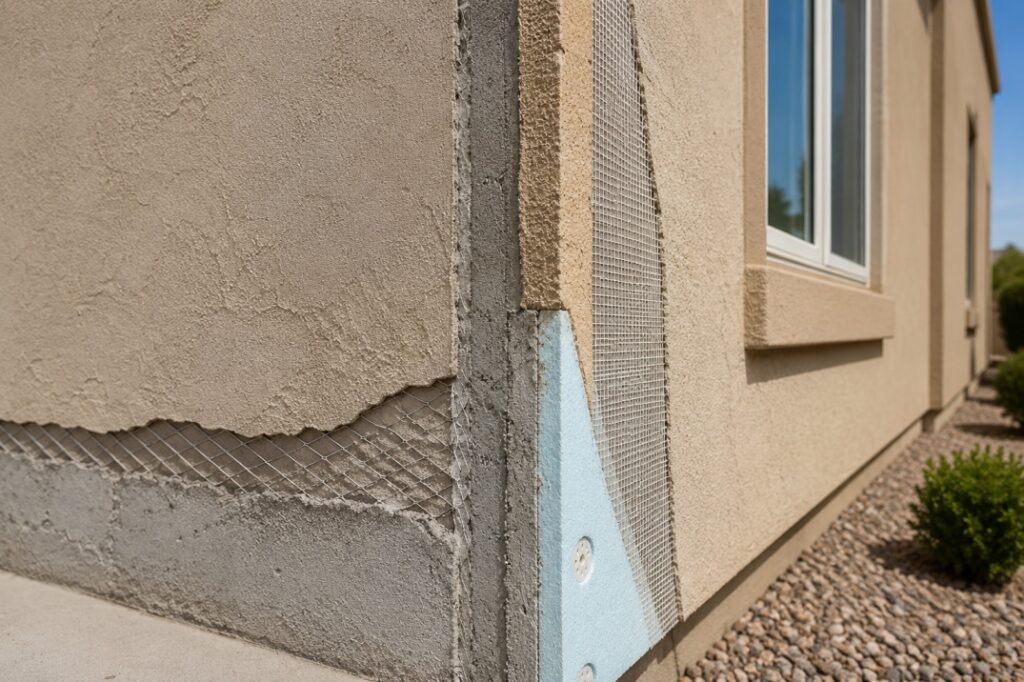
New Mexico homes are clad in a handful of distinct stucco systems, and confusing one for another is the single most common reason homeowners get bad advice. Checking permit history or asking a contractor to assess the actual base coat condition gives a far more accurate age estimate than simply going by your home’s build year, since many New Mexico properties have had partial or full restucco work done at some point along the way.
Traditional three-coat cement stucco (scratch coat, brown coat, finish coat over metal lath) is the system most common on older New Mexico homes and remains the standard for new construction and restucco work across the state. When it’s installed to ASTM C926 and ASTM C1063 specifications, this system is designed to last 50 to 80 years at the structural level. The finish coat on top, which is what you actually see and touch, has a much shorter practical life: typically 15 to 25 years before chalking, fading, and hairline cracking call for a fresh coat.
One-coat stucco systems, common in production-built New Mexico neighborhoods from the 1990s and 2000s, use a polymer-modified base coat over foam or fiberglass mesh reinforcement in place of the traditional three layers. These systems can perform well, but they’re less forgiving of installation shortcuts, and their practical lifespan tends to run 30 to 50 years before major intervention is needed.
EIFS (Exterior Insulation and Finish Systems), the synthetic foam-core stucco found on a meaningful share of Rio Rancho homes built between the mid-1980s and mid-2000s, is where lifespan expectations diverge the most. A correctly flashed and drained EIFS wall can last 30 years or more. An EIFS wall with a history of poor window flashing, which was unfortunately common during that construction era, can develop hidden moisture damage inside the foam core within 10 to 15 years, long before the exterior shows anything alarming.
What Actually Determines How Long Your Stucco Lasts
The material itself is rarely the limiting factor. Four things do most of the work in deciding whether a wall reaches its full lifespan or fails early.
Installation quality against the standard. ASTM C926 governs the plaster mix, coat thickness, and cure times; ASTM C1063 governs how the lath is fastened and lapped. Walls that skip the required 48-hour cure between coats, or that use undersized lath fastening spacing, develop weak points that show up as premature cracking years before a code-compliant wall would.
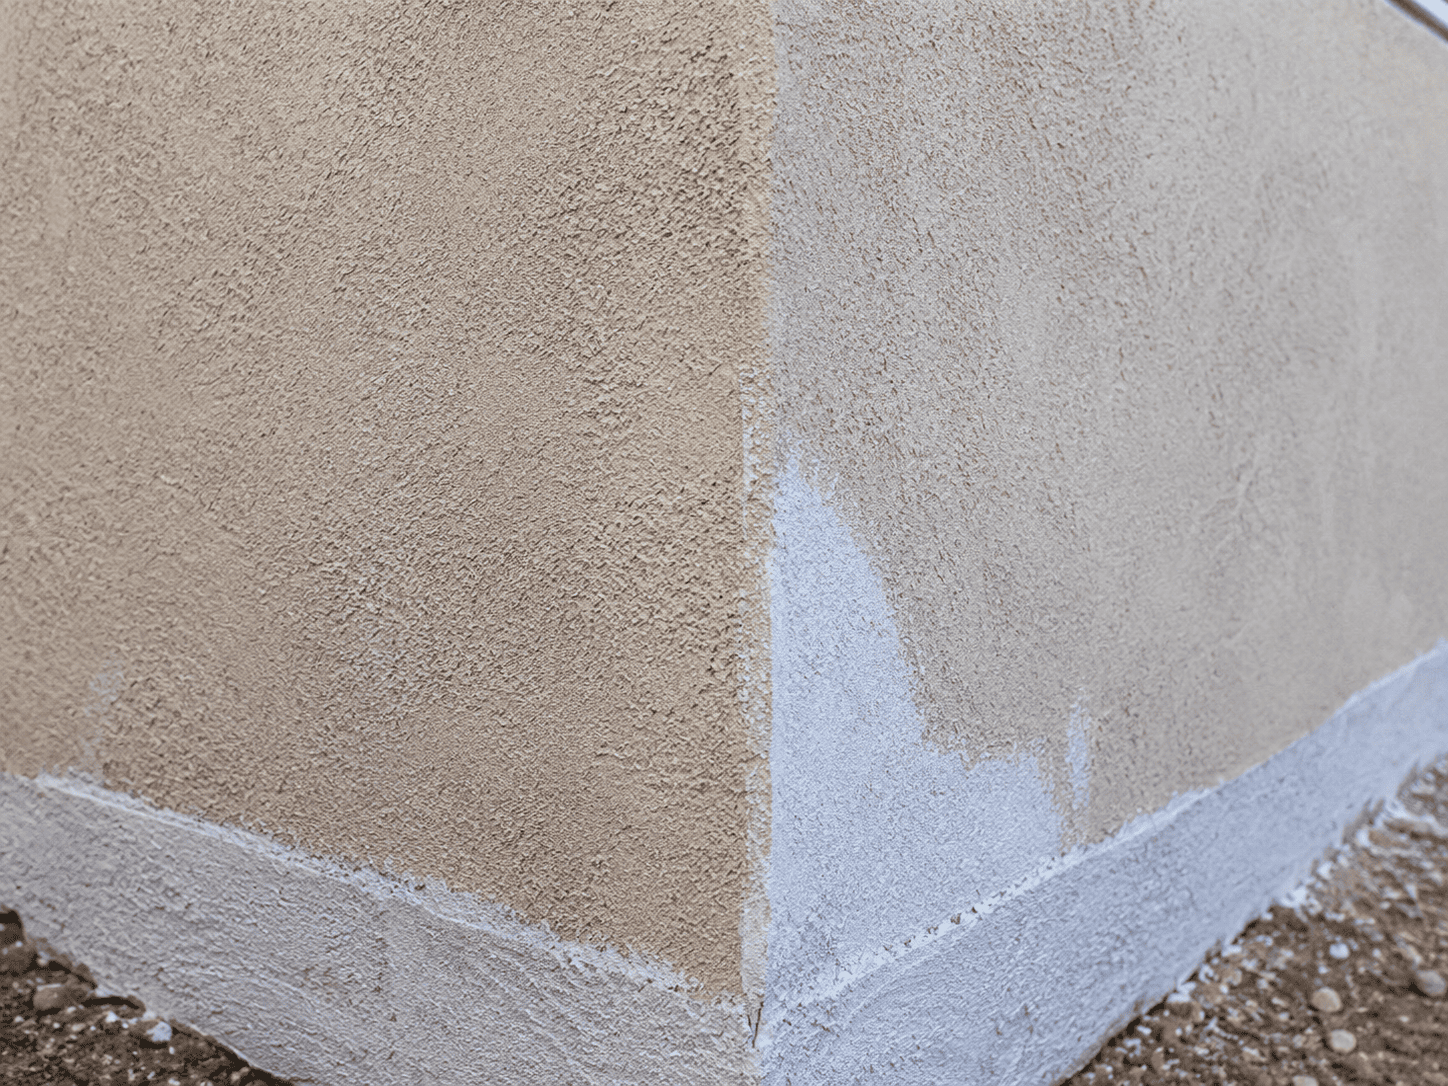
Weep screed placement. Every framed stucco wall needs a weep screed at the base, set with proper clearance above grade, that gives moisture a way out of the wall cavity. The Stucco Manufacturers Association guide specification calls for this clearance because stucco is not a waterproof membrane. It’s a reservoir cladding system that absorbs and releases moisture over time, and the actual water barrier is the weather-resistive layer behind it, not the visible finish. A buried or improperly flashed weep screed traps water at the wall base and accelerates rot and lath corrosion from the bottom up.
Control joint spacing. Stucco expands and contracts with New Mexico’s wide daily temperature swings. Control joints give that movement somewhere to go. Walls without enough joints, or with joints placed incorrectly, develop stress cracks in predictable patterns that widen every season.
Substrate and moisture management. The weather-resistive barrier required under the International Residential Code is what actually keeps bulk water out of the wall assembly. Stucco’s job is to shed most of the water and manage the rest; the barrier behind it handles what gets through. When that barrier is missing, damaged, or improperly lapped at penetrations, the stucco above it can look fine on the surface while the wall assembly underneath is already failing.
New Mexico’s Climate: Accelerant, Not Cause
New Mexico’s stucco doesn’t fail because of the climate alone. It fails when a wall with one of the four vulnerabilities above meets New Mexico’s specific stress patterns.
Statewide, two forces do most of the damage. The first is thermal cycling: large daily temperature swings between intense daytime sun and cool desert nights open and close hairline cracks year-round, a stress pattern that’s especially pronounced around stucco repair Albuquerque properties given the metro’s elevation and exposure. The second is moisture timing: New Mexico gets relatively little annual precipitation, per NOAA climate normals, but what does fall tends to arrive concentrated in short, intense monsoon bursts or, at higher elevations, as freeze-thaw cycles through winter. Concentrated moisture events punish existing cracks and weak flashing far more than the same total rainfall spread evenly across the year would.
That combination is why a stucco wall’s condition in Santa Fe, Taos, Rio Rancho, or Las Cruces can look so different at the same age, even with identical materials. If you want the detailed, region-specific breakdown of how that plays out city by city, and which repair scope each pattern calls for, our stucco resurfacing versus full replacement guide covers that ground in depth. This section focuses on the statewide pattern; that guide focuses on the decision once you’re at the point of needing work done.
The Stucco Aging Timeline: What to Expect, Decade by Decade
Years 0 to 10: A correctly installed wall should show almost nothing at this stage beyond a handful of hairline cracks at window corners and stress points, which is normal and expected as the material completes its initial shrinkage. Color should still be even. Any hollow-sounding sections or visible staining this early points to an installation defect, not normal aging.
Years 10 to 20: This is when the finish coat starts showing its age honestly. Expect gradual chalking and fading, particularly on south and west-facing walls that take the most sun. Hairline cracks may have widened slightly but should still sound solid when tapped. This window is the sweet spot for a resurfacing decision if the substrate underneath is sound.
Years 20 to 30: Original finish coats that haven’t been refreshed are typically at or past their service life. Twenty-year-old stucco on its own isn’t a red flag, since that’s well within the normal range for a properly installed system, but this bracket is a reasonable point to schedule a first professional assessment if you’ve never had one. This is also the range where deferred maintenance starts compounding: cracks that were never sealed have had a decade of monsoon seasons or freeze-thaw cycles to work moisture behind the surface, so homes here are the most likely to need a genuine assessment rather than a cosmetic fix.
Years 30 and beyond: Well-maintained three-coat systems can still have decades of structural life left, but this is where lath corrosion, accumulated moisture damage, and cumulative movement stress start to matter more than surface appearance. A wall in this range that’s never had a proper tap-and-probe assessment is overdue for one, regardless of how it looks from the curb.
Warning Signs Your Stucco Is Failing
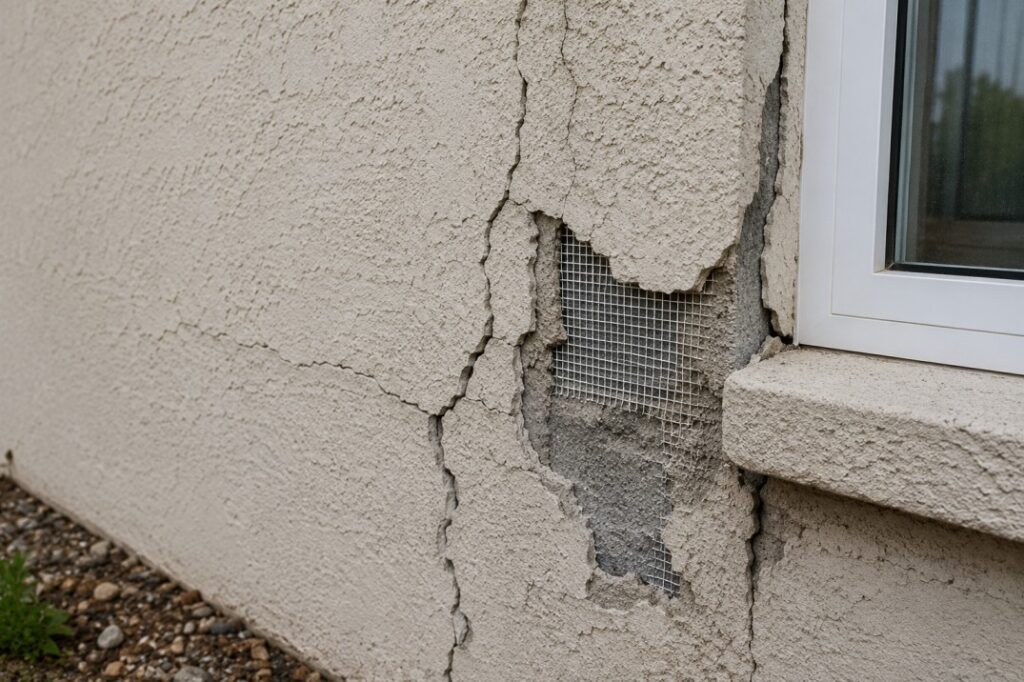
Not every crack means trouble. Sorting cosmetic aging from structural failure comes down to what the sign is telling you about the base coat and the wall assembly behind it, not just what it looks like from the driveway.
Cosmetic signs (monitor, don’t panic)
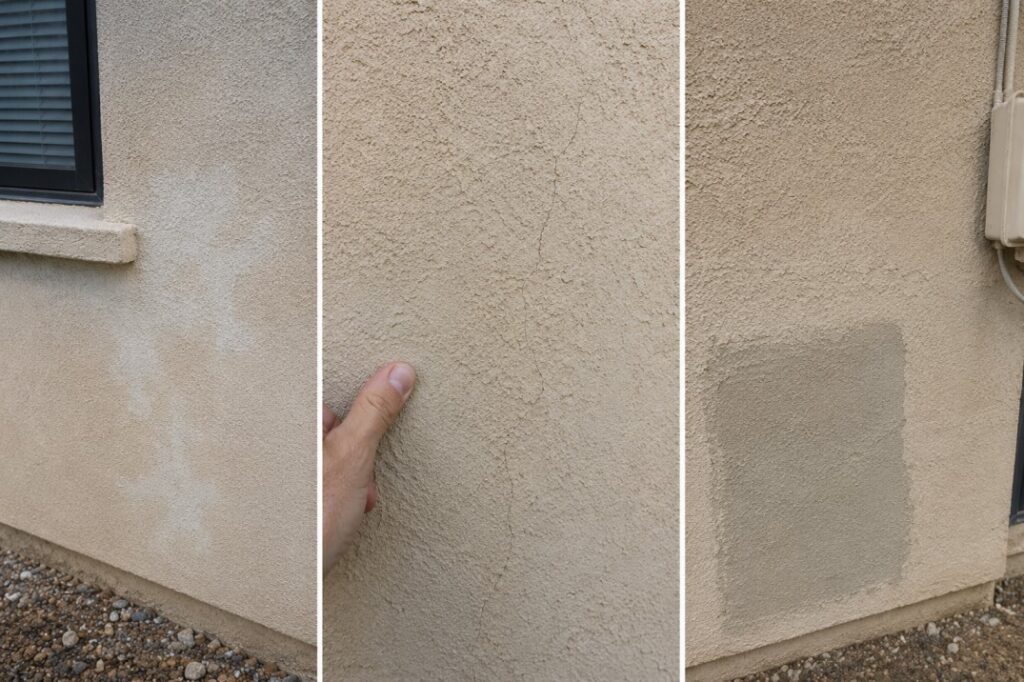
- Fading, chalking, or dulling of the finish coat color
- Hairline cracks under 1/16 inch that sound solid when tapped
- Minor texture inconsistencies around old, well-executed patches
Signs that warrant a professional look soon
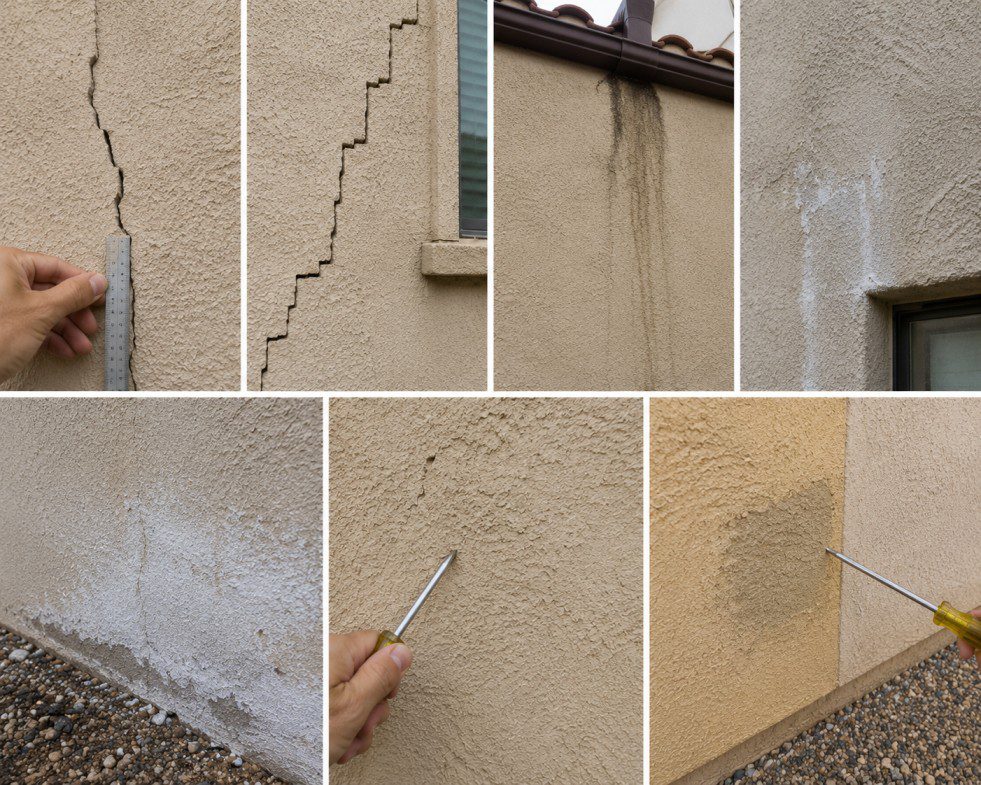
- Cracks wider than 1/16 inch, especially ones that follow a straight or stair-step pattern
- Staining or discoloration streaking down from a specific point, which usually traces back to a flashing or crack source above it
- Efflorescence, the chalky white mineral deposits that indicate water has been moving through the material
- Sections that sound noticeably different when tapped compared to the surrounding wall
Signs that call for an assessment before any cosmetic work happens
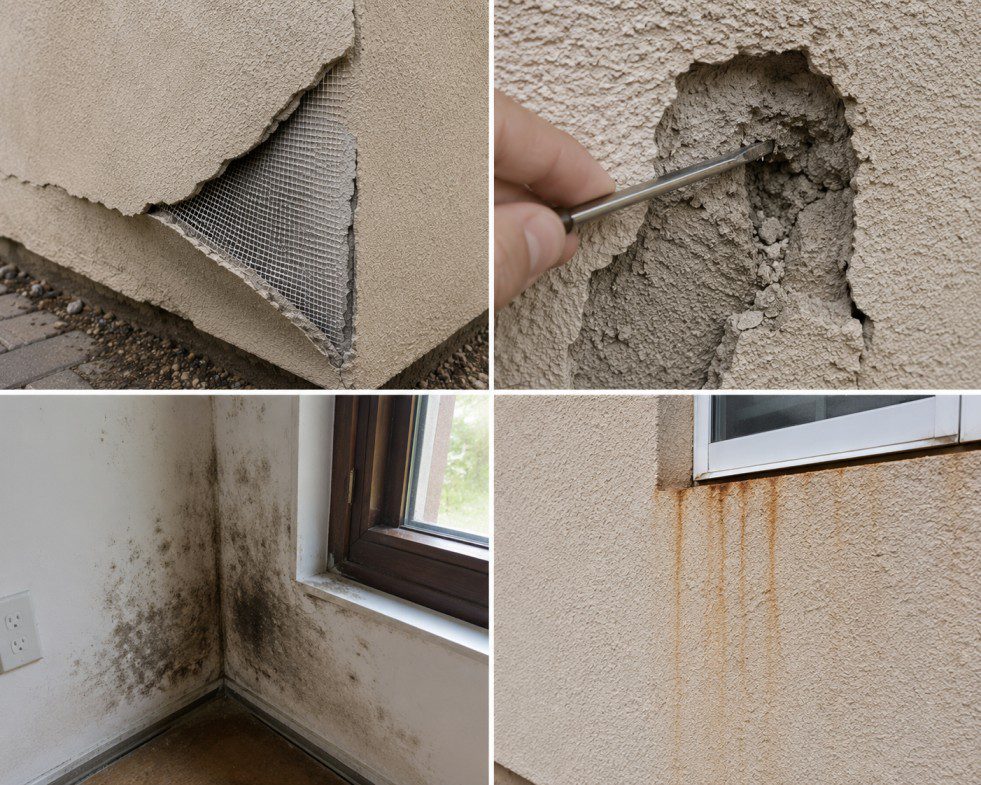
- Stucco visibly separating or bulging away from the wall surface
- Soft or crumbling material found during a probe test
- Visible mold, organic growth, or a persistent musty smell near an exterior wall indoors
- Rust staining bleeding through the finish, which usually means the lath underneath has started corroding
Three Checks You Can Do This Weekend
You don’t need professional equipment to get a reasonable first read on your own wall.
- The tap test. Using a knuckle or the handle of a screwdriver, tap across a section of wall in a grid pattern. A consistent, solid sound means the base coat is still bonded to the substrate. A hollow or dull thud means that section has delaminated.
- The visual raking-light check. Walk the exterior at dusk or with a flashlight held at a low angle against the wall. Raking light reveals texture inconsistencies and hairline cracks that are nearly invisible in direct daylight.
- The garden hose check. On a section you’re uncertain about, run water over it for 10 to 15 minutes and check for interior staining or dampness afterward. This won’t catch everything, but a wall that shows interior moisture from a simple hose test has a flashing or crack problem worth addressing immediately.
None of these replace a licensed contractor’s moisture meter and probe assessment, but they’ll tell you whether that call needs to happen this month or can reasonably wait.
Maintenance That Adds Years (and Habits That Quietly Remove Them)
The single biggest lifespan lever a homeowner controls isn’t material choice. It’s how quickly cracks get sealed after they appear. A hairline crack sealed within its first year or two stays a cosmetic issue indefinitely. The same crack left open through three or four monsoon seasons becomes a moisture entry point that can compromise the base coat, and it’s often the difference between a wall that reaches its full 50-to-80-year structural lifespan and one that needs major intervention decades early.
A few habits matter more than most homeowners expect:
- Keep sprinkler heads and irrigation lines pointed away from stucco walls; consistent sprinkler overspray is one of the more common causes of localized base coat failure near the ground
- Maintain gutters and downspouts so water discharges away from the foundation rather than sheeting down a wall section repeatedly
- Reseal caulking around windows and penetrations every 5 to 7 years, since failed caulk at these points is where a large share of New Mexico stucco moisture problems originate
- Schedule a visual inspection roughly every five years, even when nothing looks wrong, since the gap between visible symptoms and underlying wall condition tends to widen with age
When Age Stops Being the Deciding Factor
Two walls of identical age can call for two completely different scopes of work. A 25-year-old wall in Las Cruces with sound, dry base coats and UV-faded finish is a resurfacing candidate. A 25-year-old wall in Rio Rancho with a documented history of window flashing failures might need full EIFS replacement, regardless of how it looks from the street.
Once you’ve used the timeline and warning signs above to get a general read on where your wall stands, the actual scope decision (resurface, partial replace, or full replace) comes down to substrate condition, not age alone. That’s the exact framework our stucco resurfacing versus full replacement guide walks through, including the specific tap test and moisture assessment steps a contractor should perform before recommending either option.
Cost Context by Age Bracket
Budgeting reasonably starts with matching your wall’s likely condition to the correct scope rather than assuming the worst or the cheapest option applies. Homes in the 10 to 20 year range are usually looking at color-coat or resurfacing pricing. Homes past 25 to 30 years with any of the structural warning signs above should budget for the possibility of partial or full replacement. For current New Mexico pricing broken down by scope and region, see our stucco repair cost in Albuquerque breakdown.
Wondering where your own stucco stands on this timeline? Happy Homes LLP performs tap tests, moisture assessments, and full visual inspections across Albuquerque, Rio Rancho, Santa Fe, Las Cruces, Taos, and surrounding New Mexico communities. Call (505) 382-4757 or contact us for a free, no-obligation assessment before you spend a dollar on repairs.